You manage a career site right after the site has been created to complete its configuration. When you are managing a site, you can configure site pages (including the job opening ad page and talent pool ad page), layouts, details, google analytics, etc., as well as publish the site. You can return to site management at any moment, for example, when you want to change its configuration.
To manage a career site:
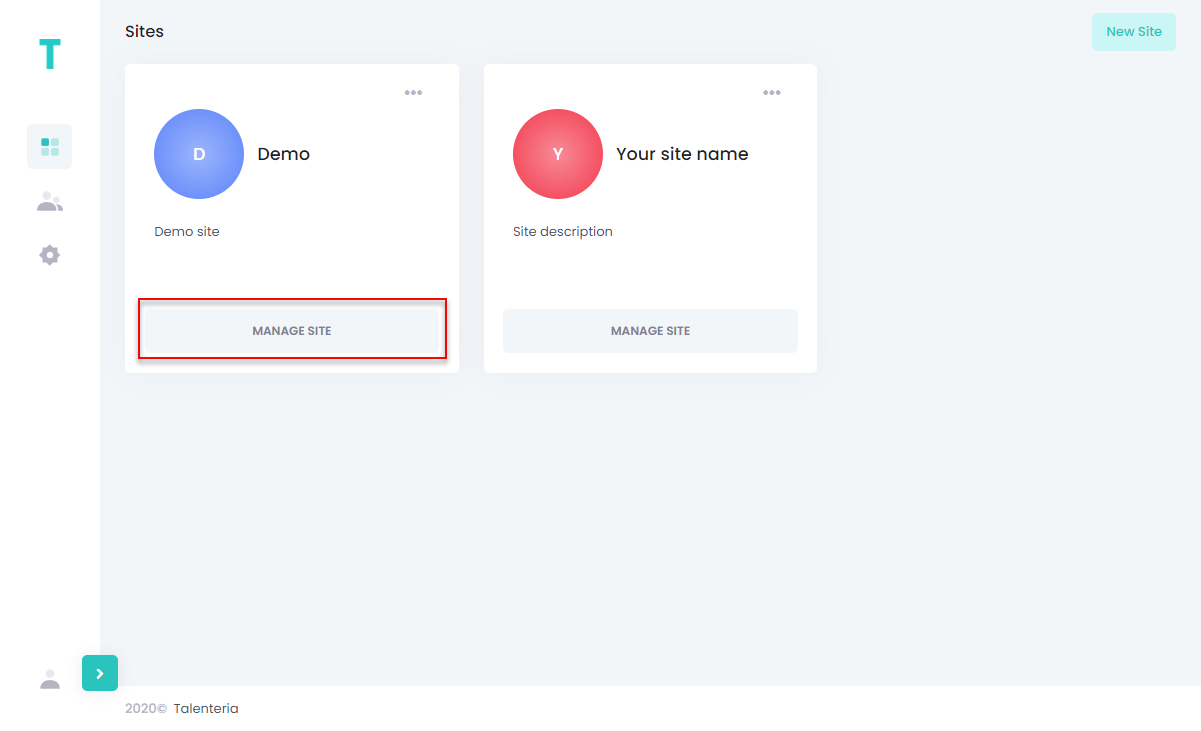
- Go to Sites, Pages and Application Forms > Sites.
- On the Sites page, select Manage Site on the tile of the site that you want to manage.
The site management page has the following tabs where you can configure site elements:
Pages
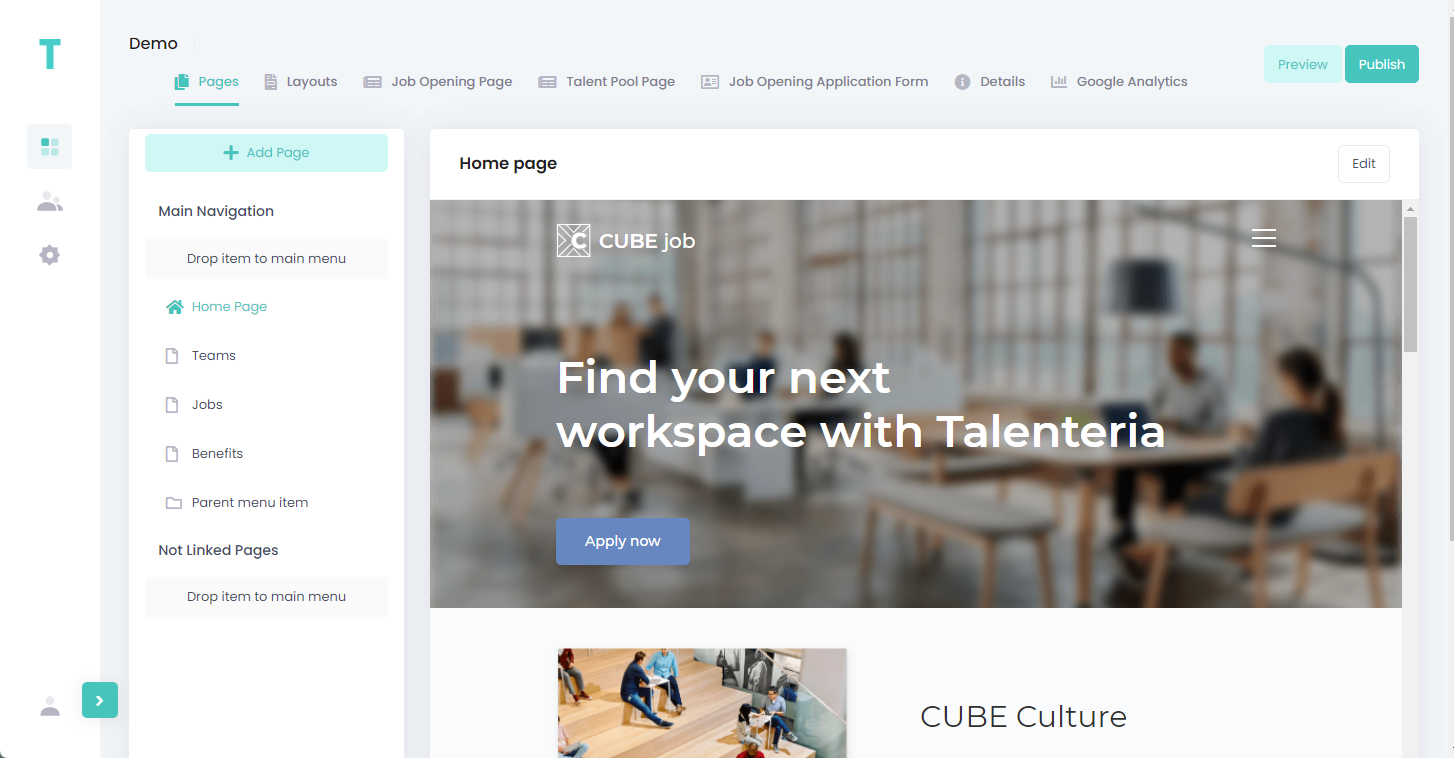
On the Pages tab, you can configure the pages of your career site as well as set up the site navigation menu. If you chose a site template during site creation, the site pages will be taken from that template, however, you can edit, remove, or add new pages if necessary.
Add a page
To a add a new page to the site:
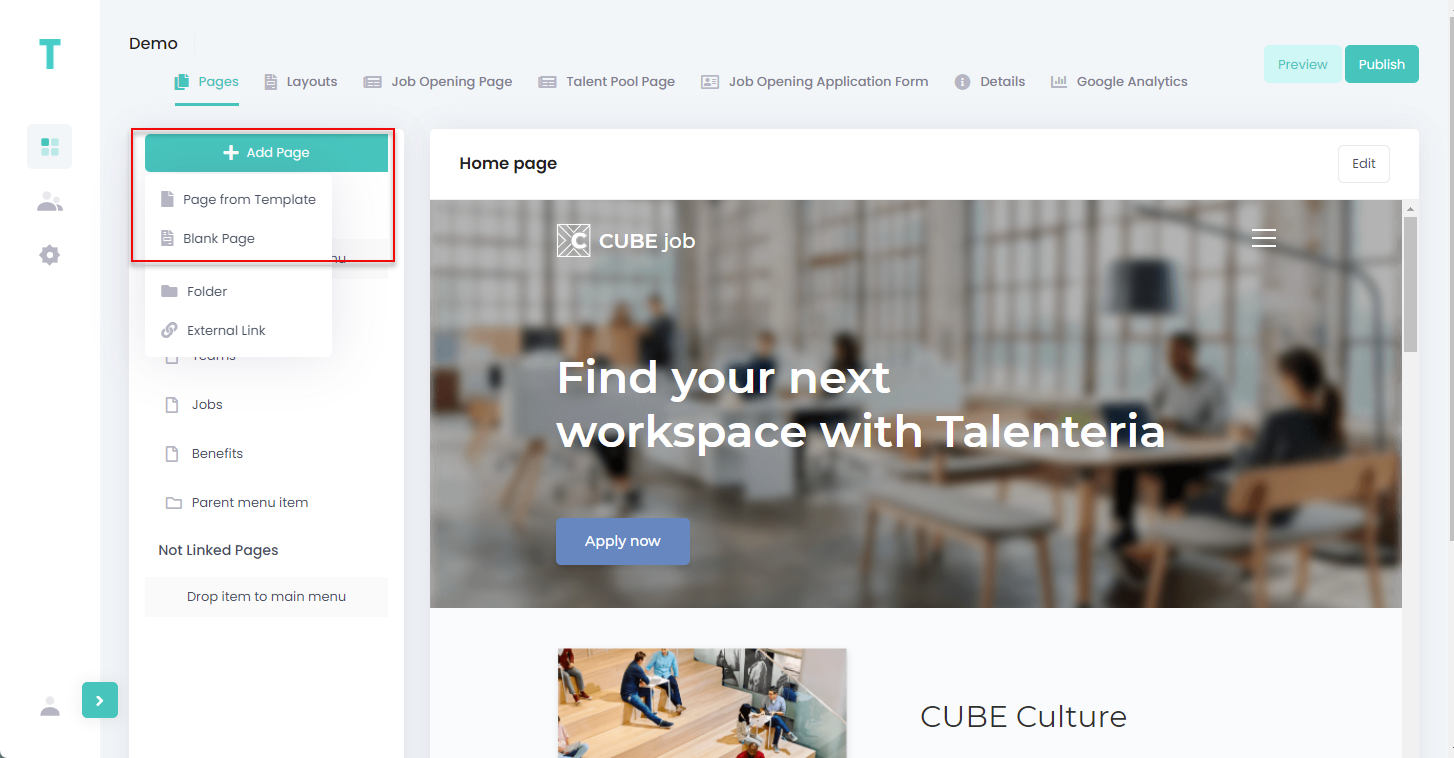
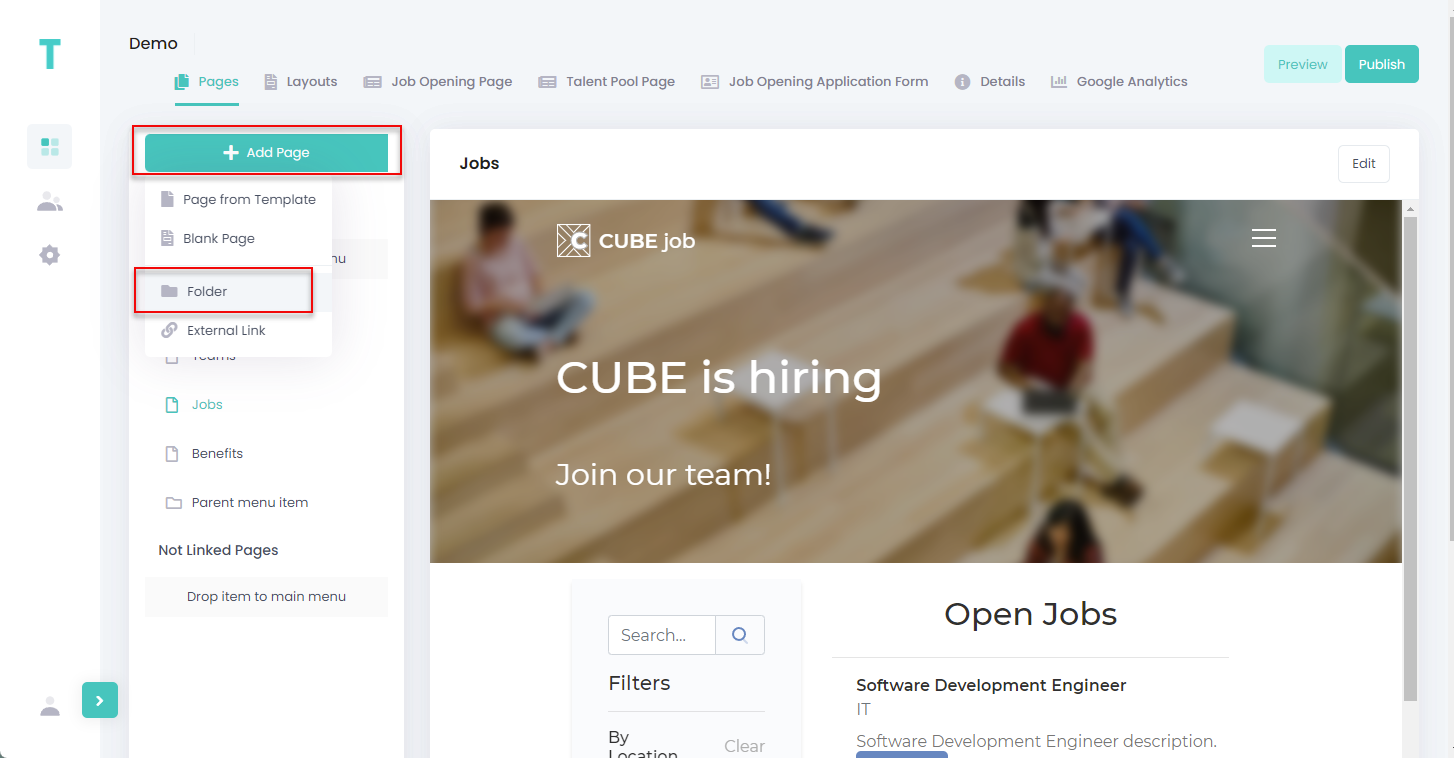
- On the Pages tab of the site management page, select Add Page.
- Select one of the following two options:
- Page from Template – Select this option if you want to add pre-configured page from a site template that was chosen during creation of the site.
- Blank Page – Select this option if you want to add a blank page, and then create its content from scratch.
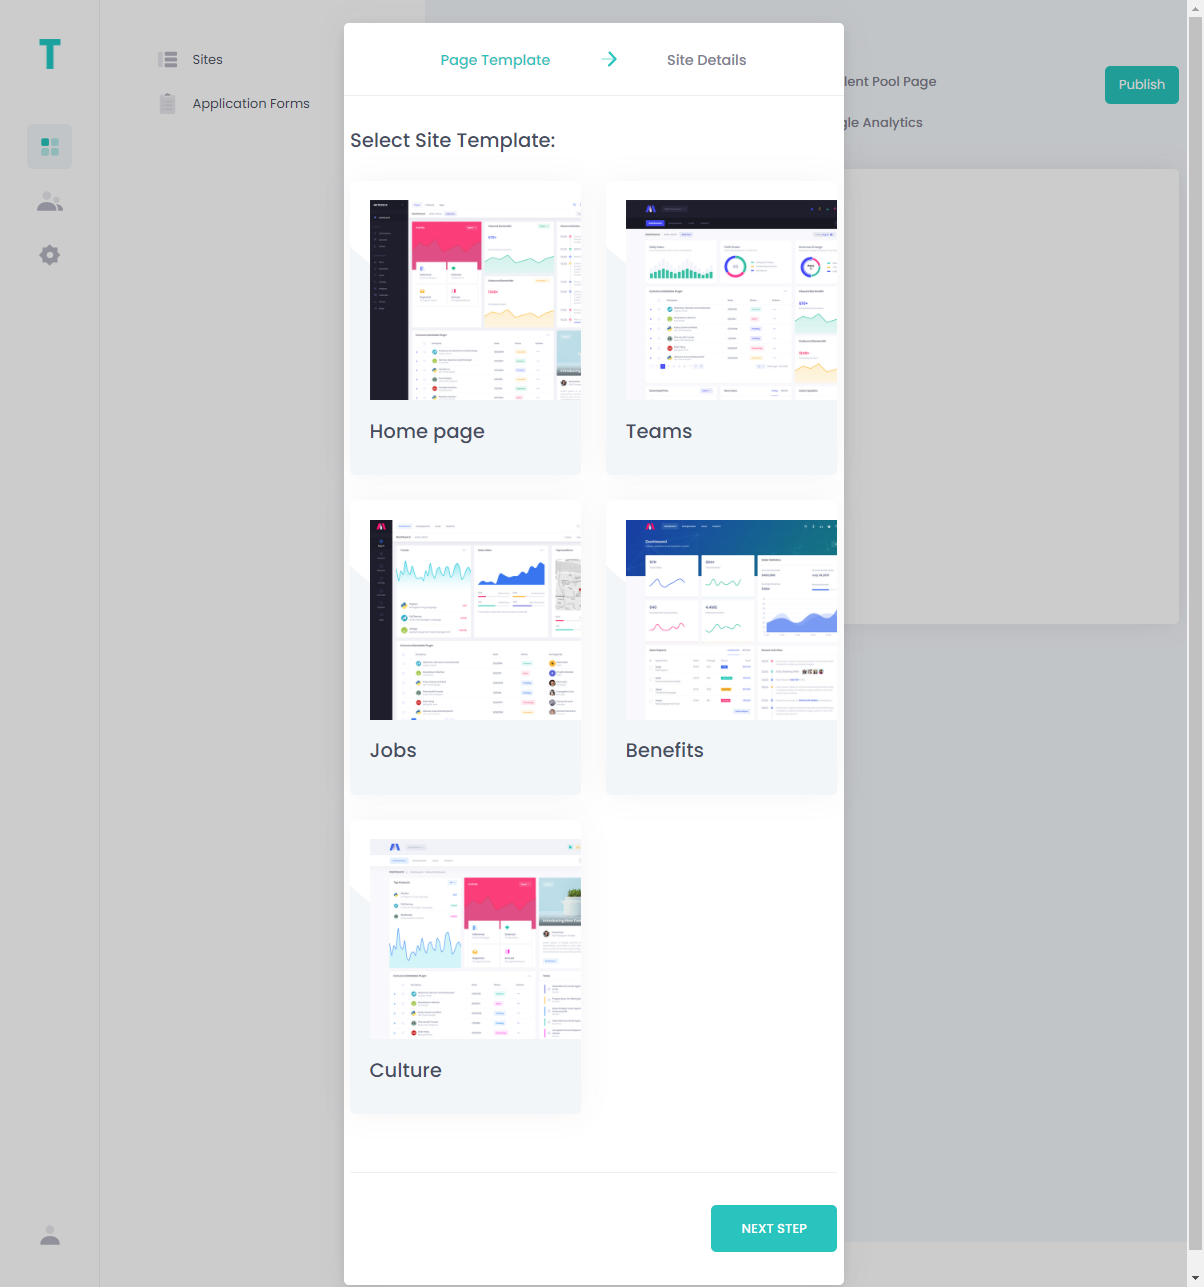
- If you chose Page from Template in the previous step, select a page from the site template in that window that appears, and then select Next Step. Otherwise, skip this step.
 NoteIf you are adding a page where job openings or talent pools will be published, you may need to edit its content and choose the corresponding placeholder: the Job List placeholder for job openings or Talent Pool List – for talent pools. See the Edit Page Content section below for more information.
 - Fill in the page details as described below:
- Page Title – Specifies the title of the page.
- Navigation Title – Specifies the title of the navigation menu item that will be used to open the page.
- Description – Specifies a description of the page. This field is optional.
- Keywords – Specifies keyword(s) that will help search engines find this page. This field is optional.
- Home Page – If you select this check box, the page will be the site home page.
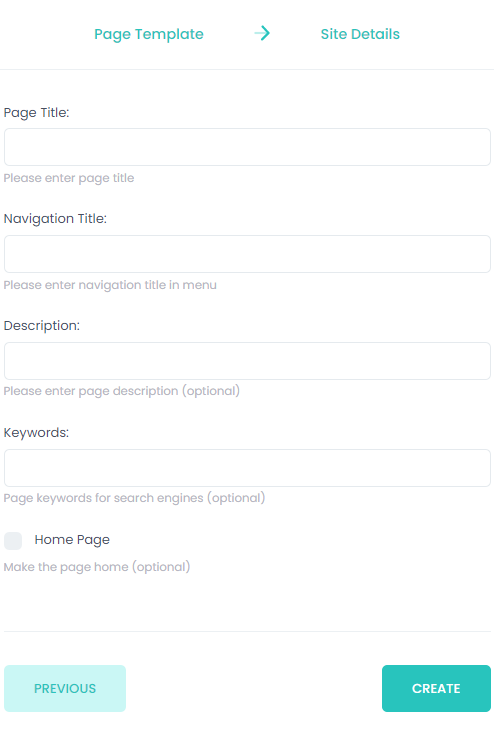
- Select Create.
- By default, the page is added as the last menu item. You can always reorganize the menu items by dragging them on the left pane of the Pages tab, under Main Navigation.
Edit page content
You can edit the content of a page on a site to add/edit such elements as HTML content blocks, images, videos, job lists, and talent pool lists.
To edit the content of a page:
- On the Pages tab of the site management page, on the left pane, select the page that you want to edit.
- Select the Edit button in the top right corner of the page preview.
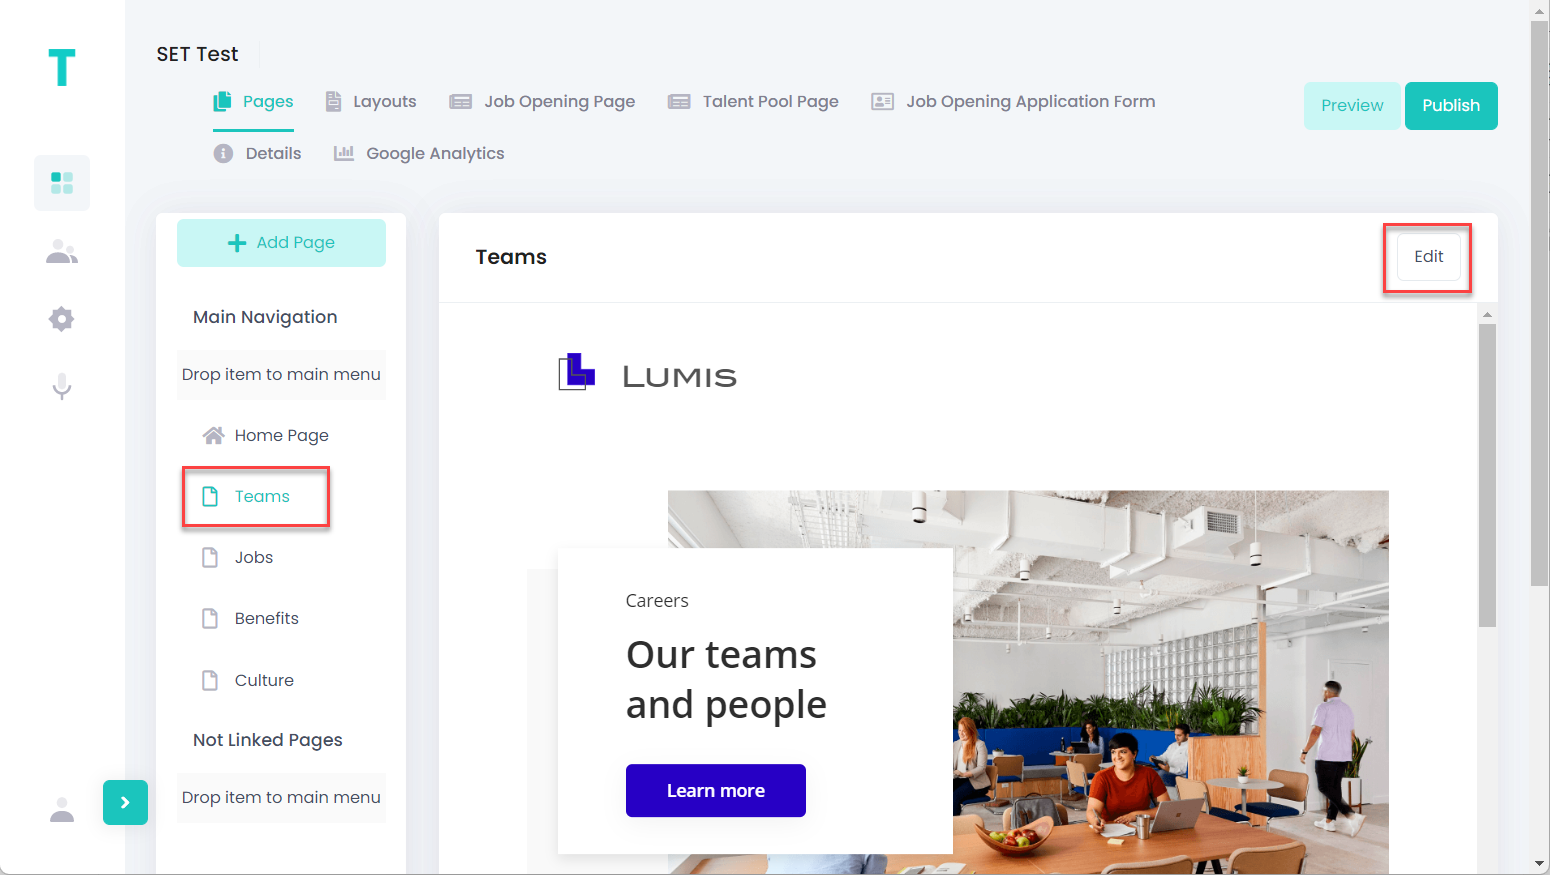 This opens the page editor with the Widgets pane open by default.
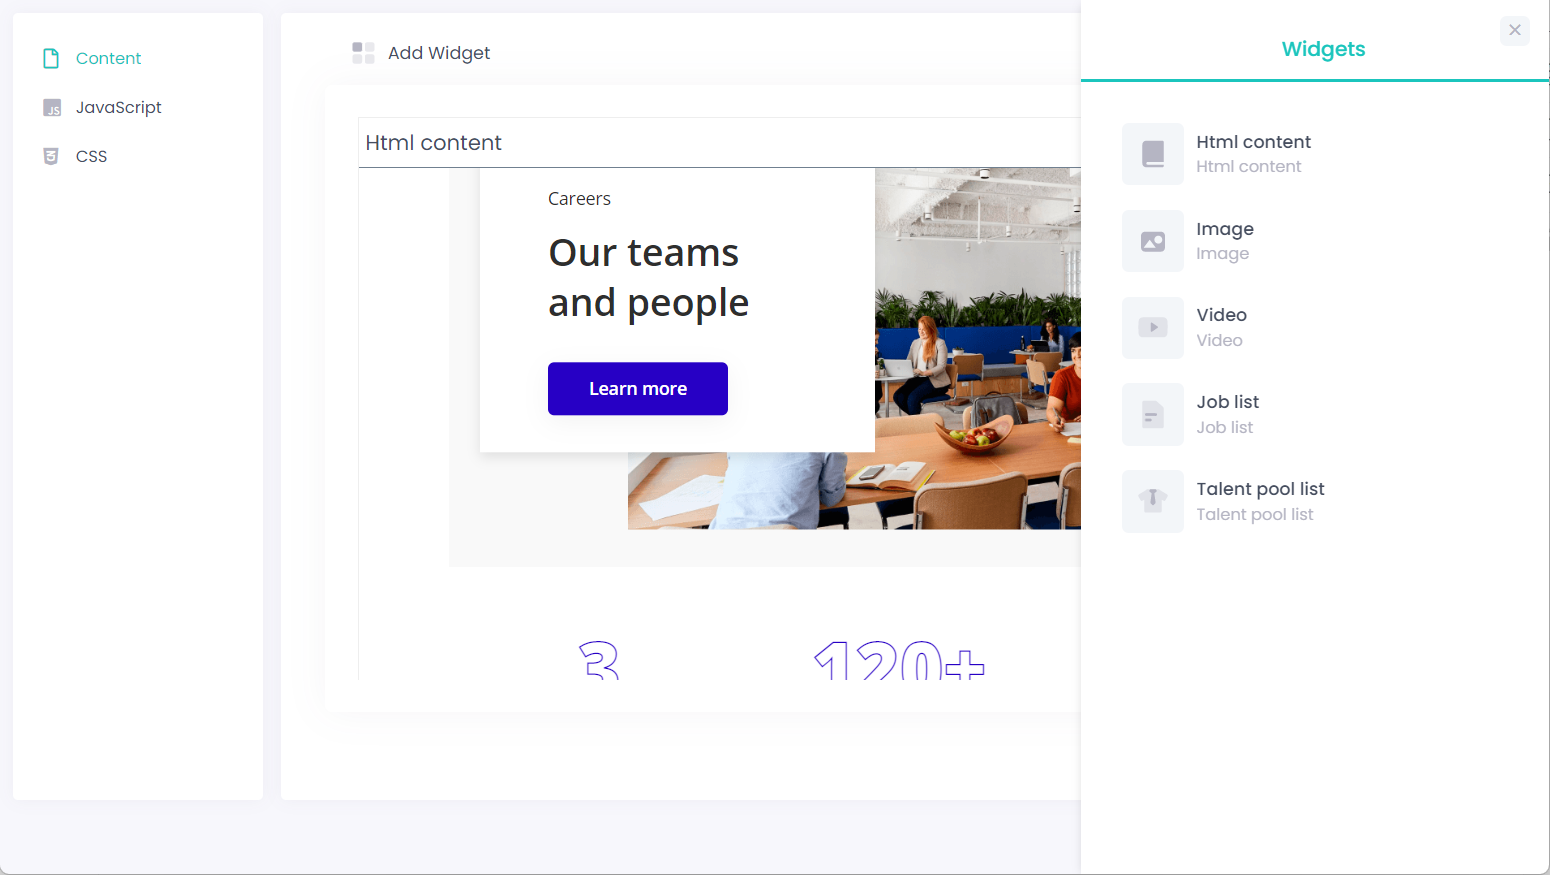
- On the Content tab, use widgets to add various content blocks or edit the existing ones. To add a content block, drag a widget from the Widgets pane to the an available area, market by gray squares.
Note If the Widgetspane is closed, use the Add Widget button to open it.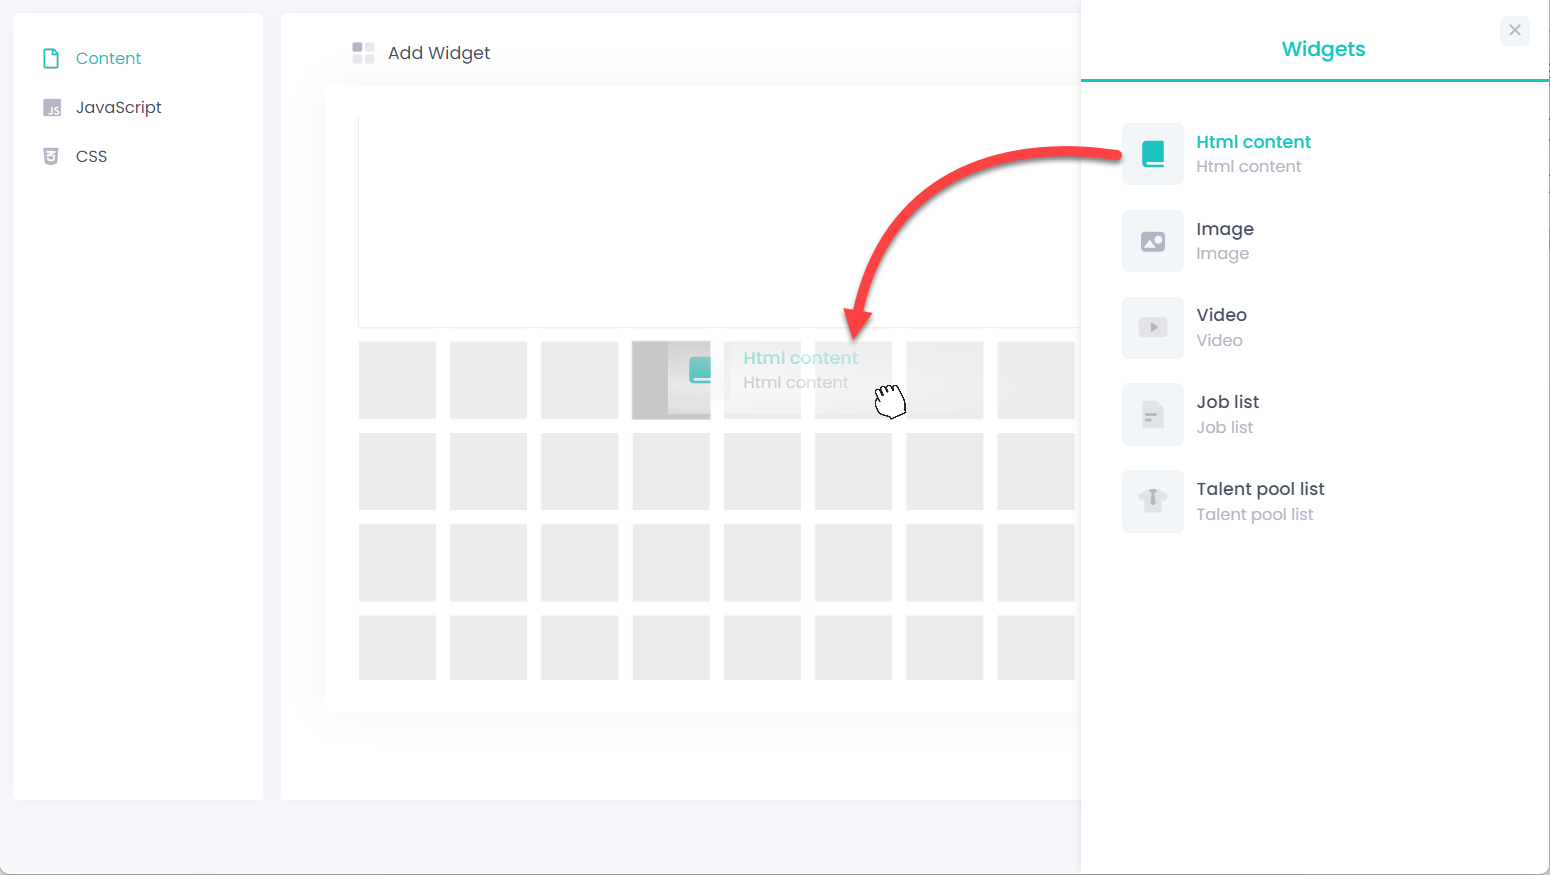 You can the following widgets:
- HTML Content - Adds an HTML content block. Click the the
 icon on the added content block to edit its content in the HTML editor.
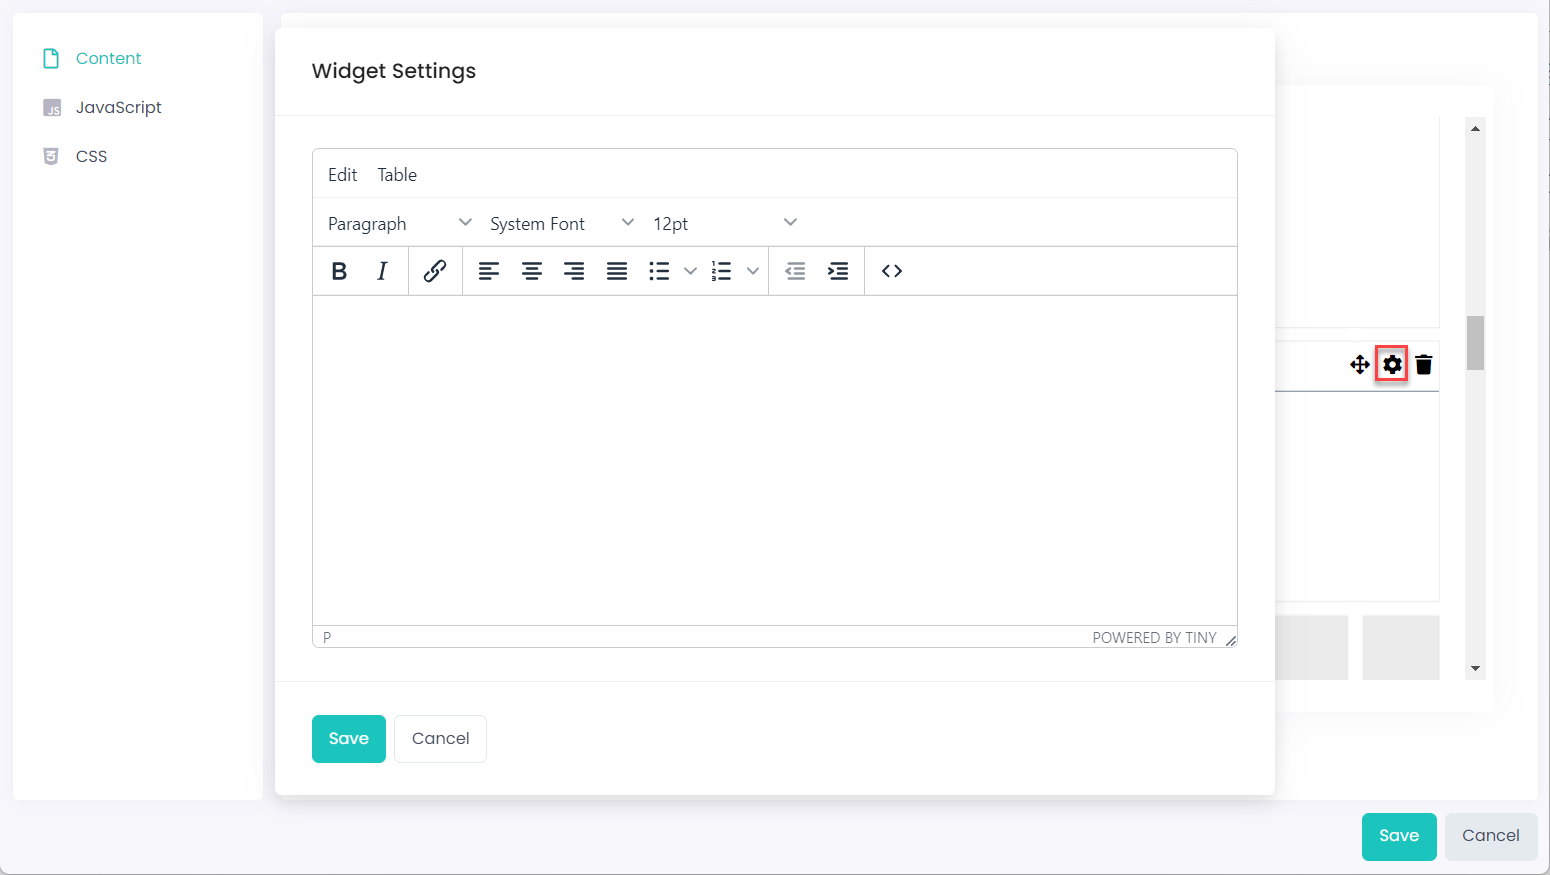
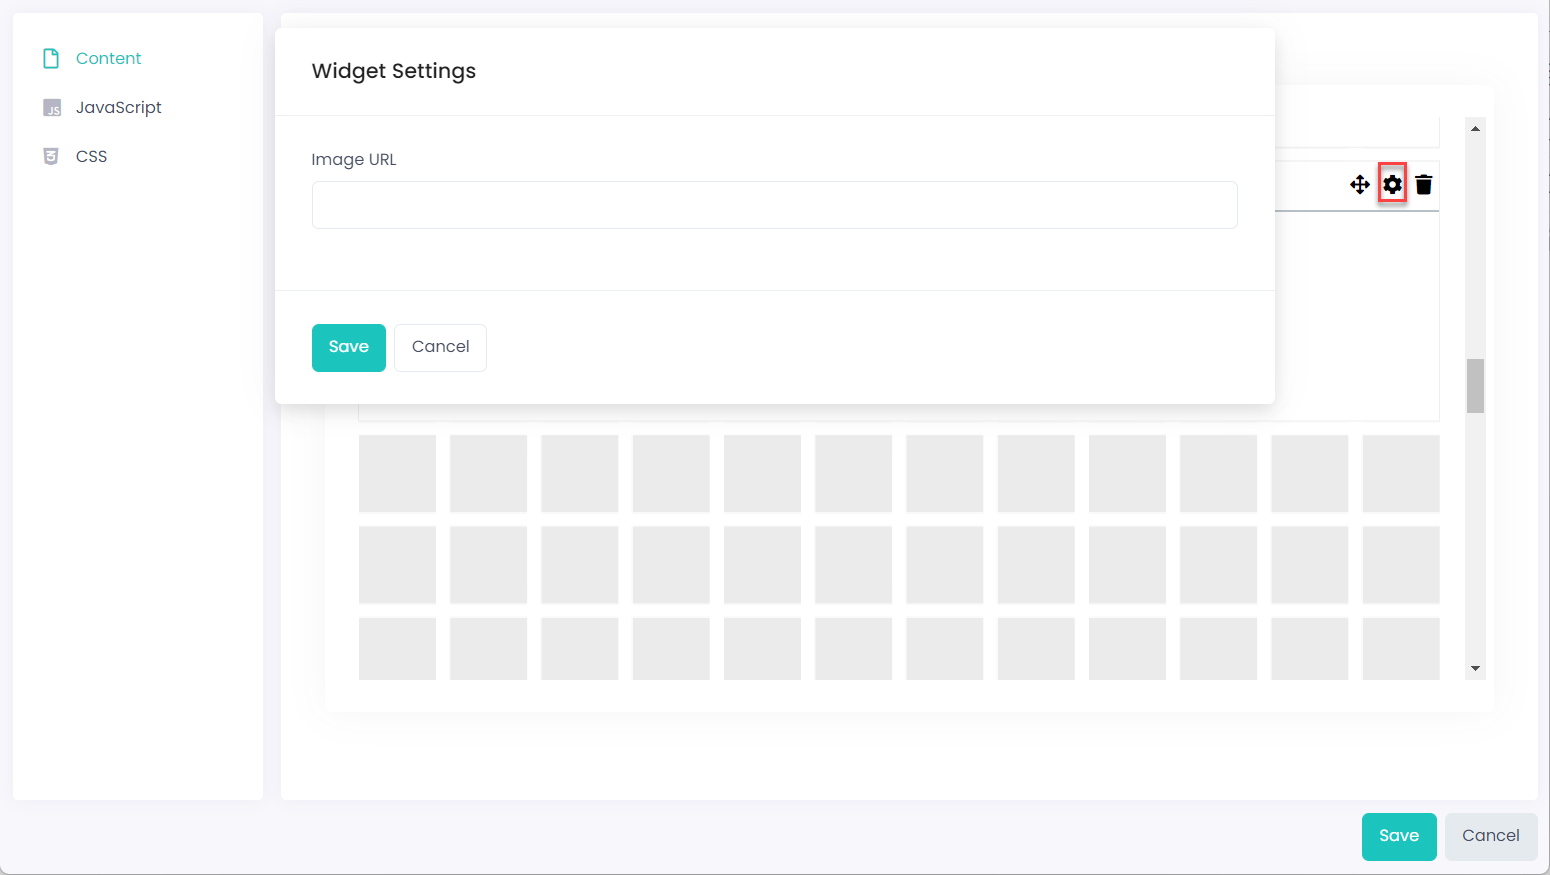
- Image - Adds a content block where you can add an image. Click the the icon on the added content block to edit the widget settings where you need to specify the URL of the image that you want to add.
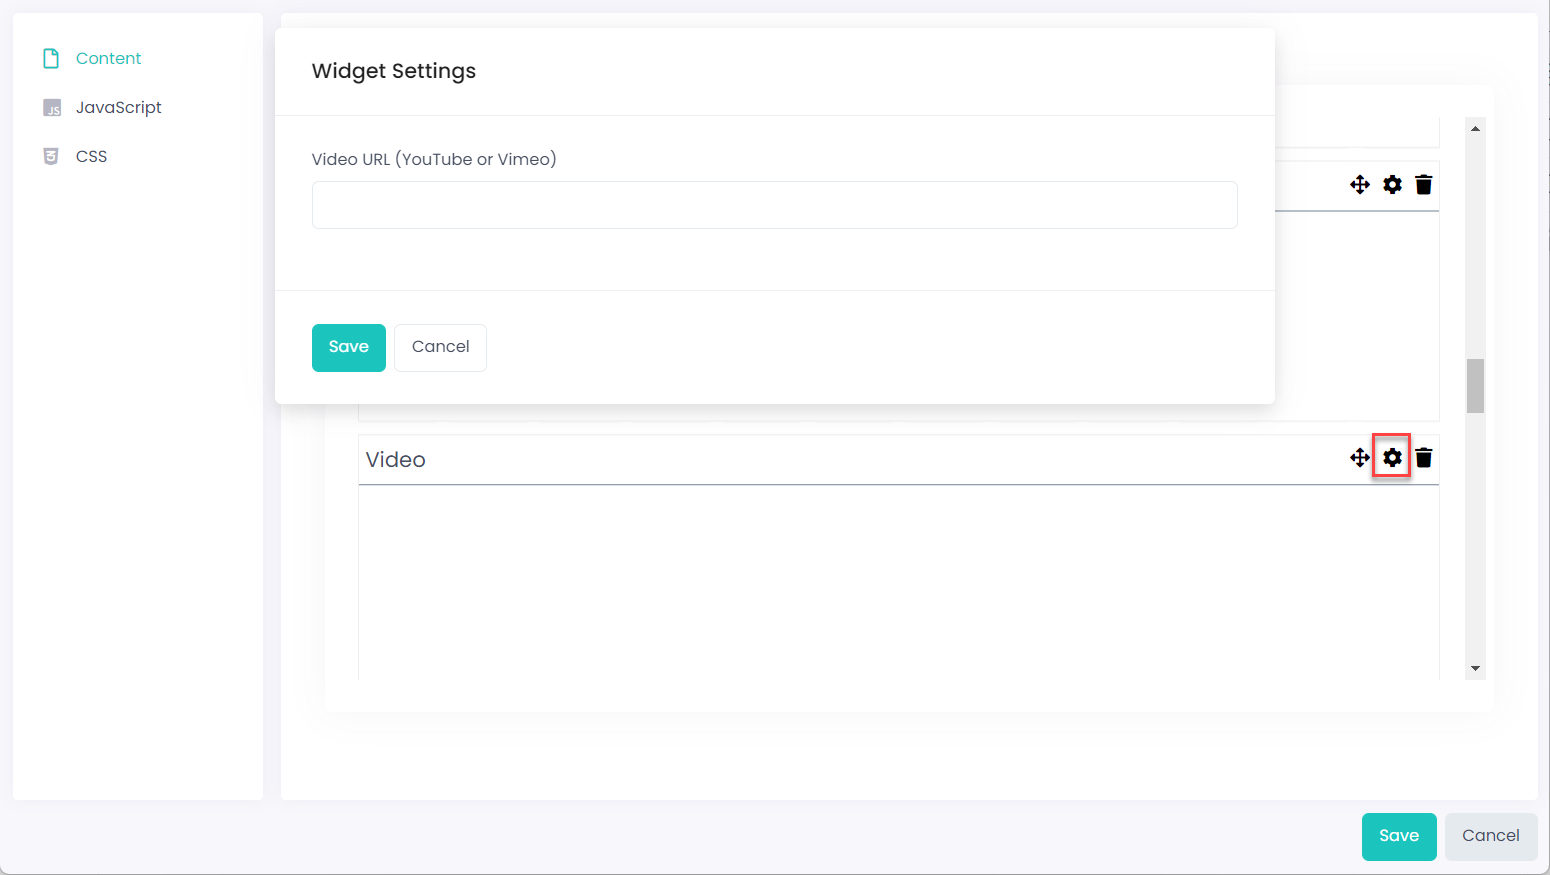
- Video - Adds a content block where you can add a video. Click the the icon on the added content block to edit the widget settings where you need to specify the URL of the video that you want to add. YouTube and Vmeo platforms are supported.
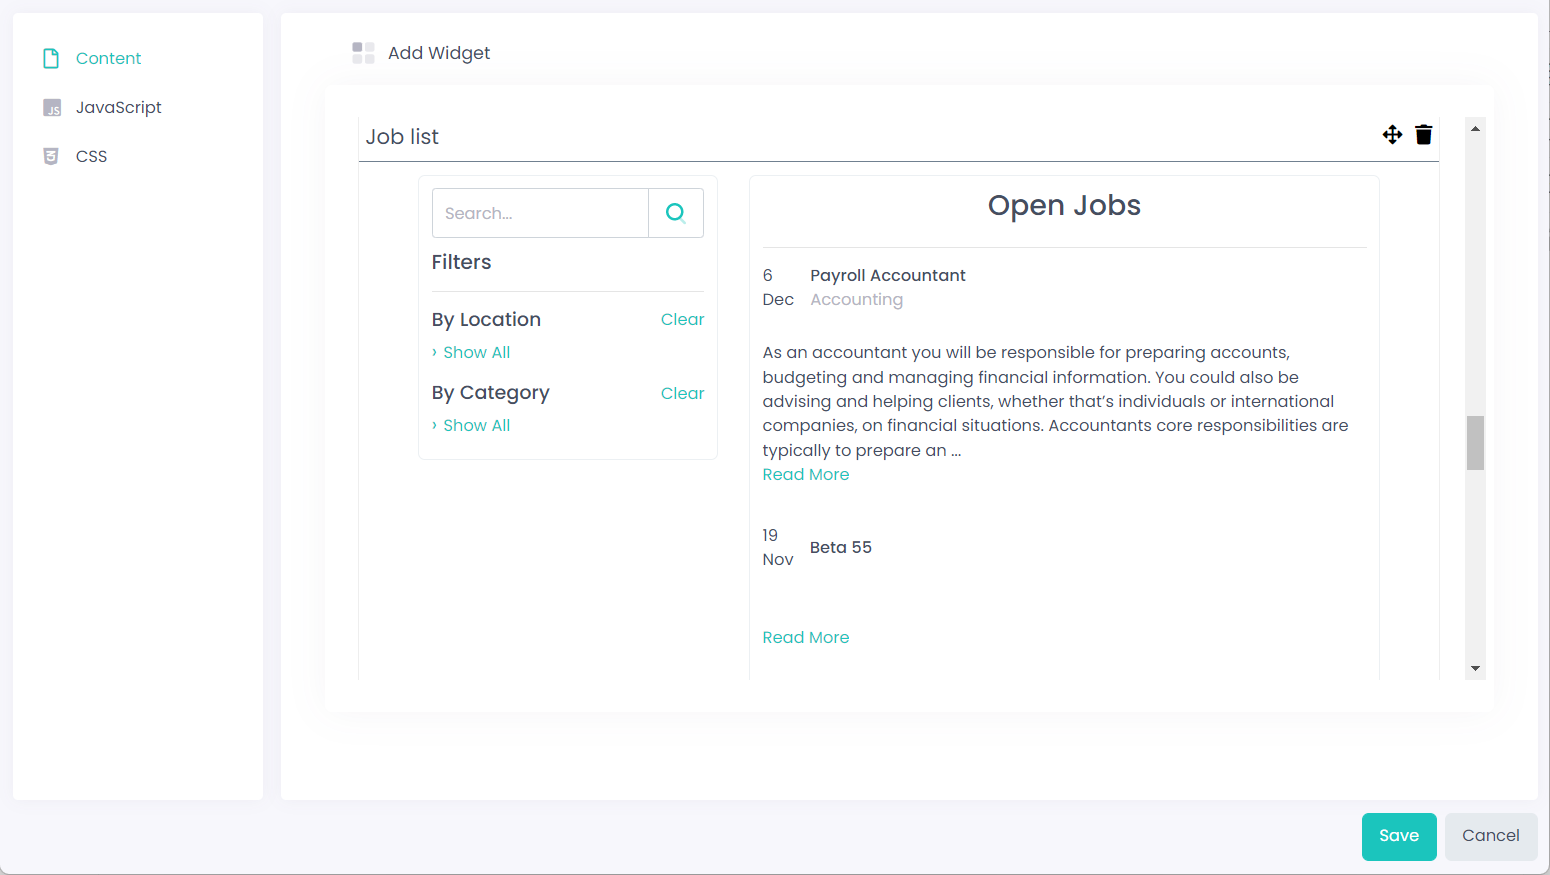
- Job list - Adds a content block where all open job openings (job openings with the Open status) will be shown. You can add only one widget of this type per page.TipDrag the corner of an added content block to expand or shrink it if you want to see more or less details.
- Talent pool list - Adds a content block where all published talent pools (talent pools with the Publish On External Site check box selected) will be shown. You can add only one widget of this type per page.
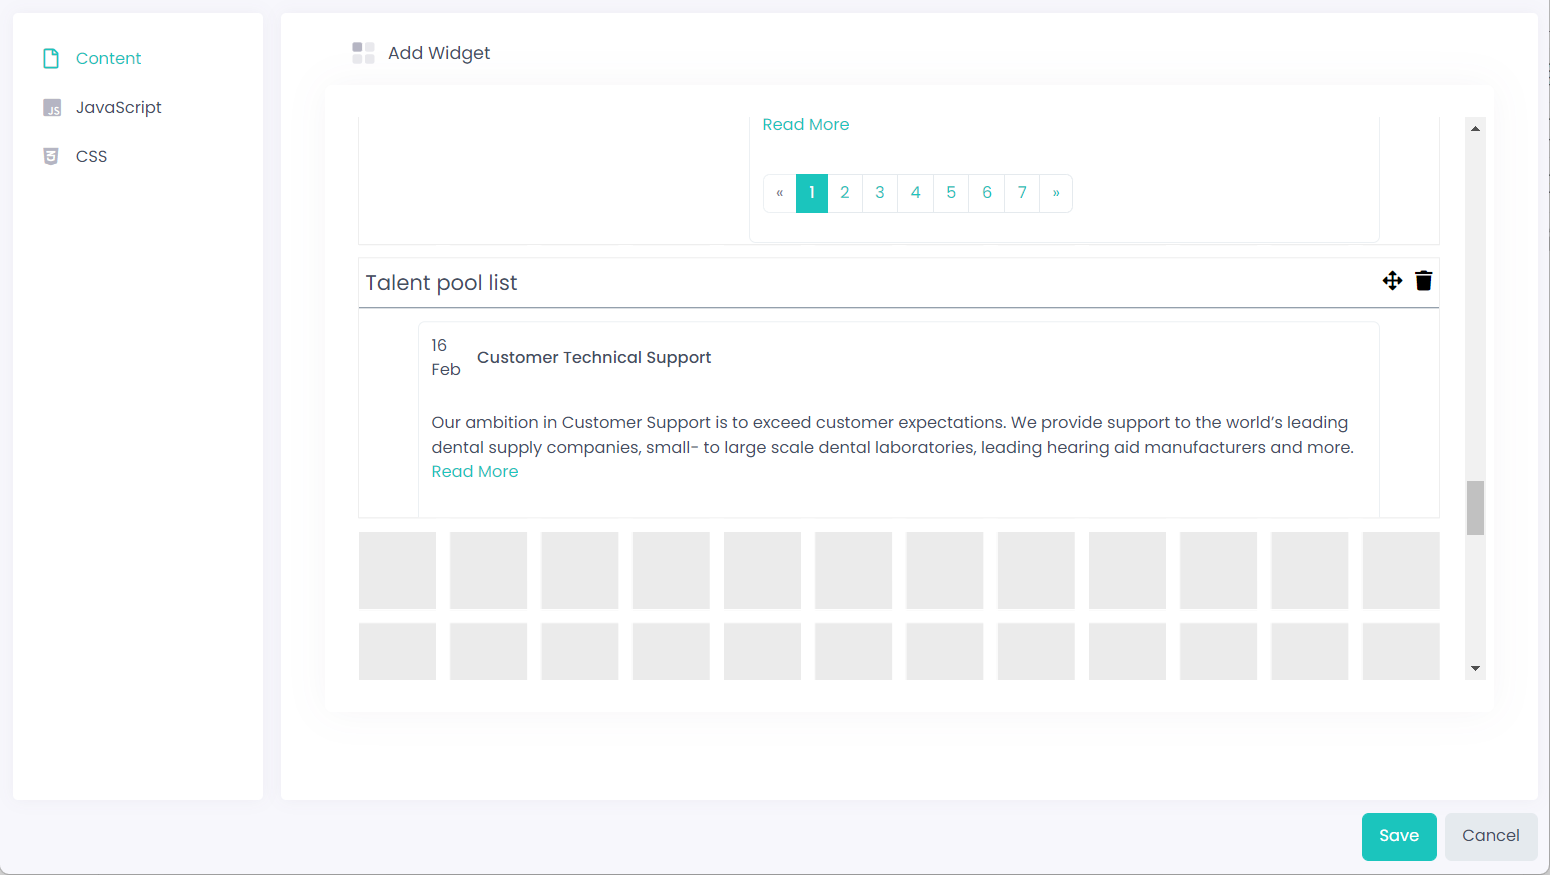
To reorganize added content blocks (widgets), you can drag them to the necessary location using the icon.
icon.
To delete a content block, select the icon.
icon.
- HTML Content - Adds an HTML content block. Click the the
- On the JavaScript tab, you can add or edit the JavaScript code used on this page.
- On the CSS tab, you can add or edit Cascading Style Sheets (CSS) used on this page.
- Select the Save button when you are done editing the page content.
Edit page details
To edit the page details:
- On the Pages tab of the site management page, on the left pane, hover over the page the details of which you want to edit.
- Select the
 icon next to the page title.
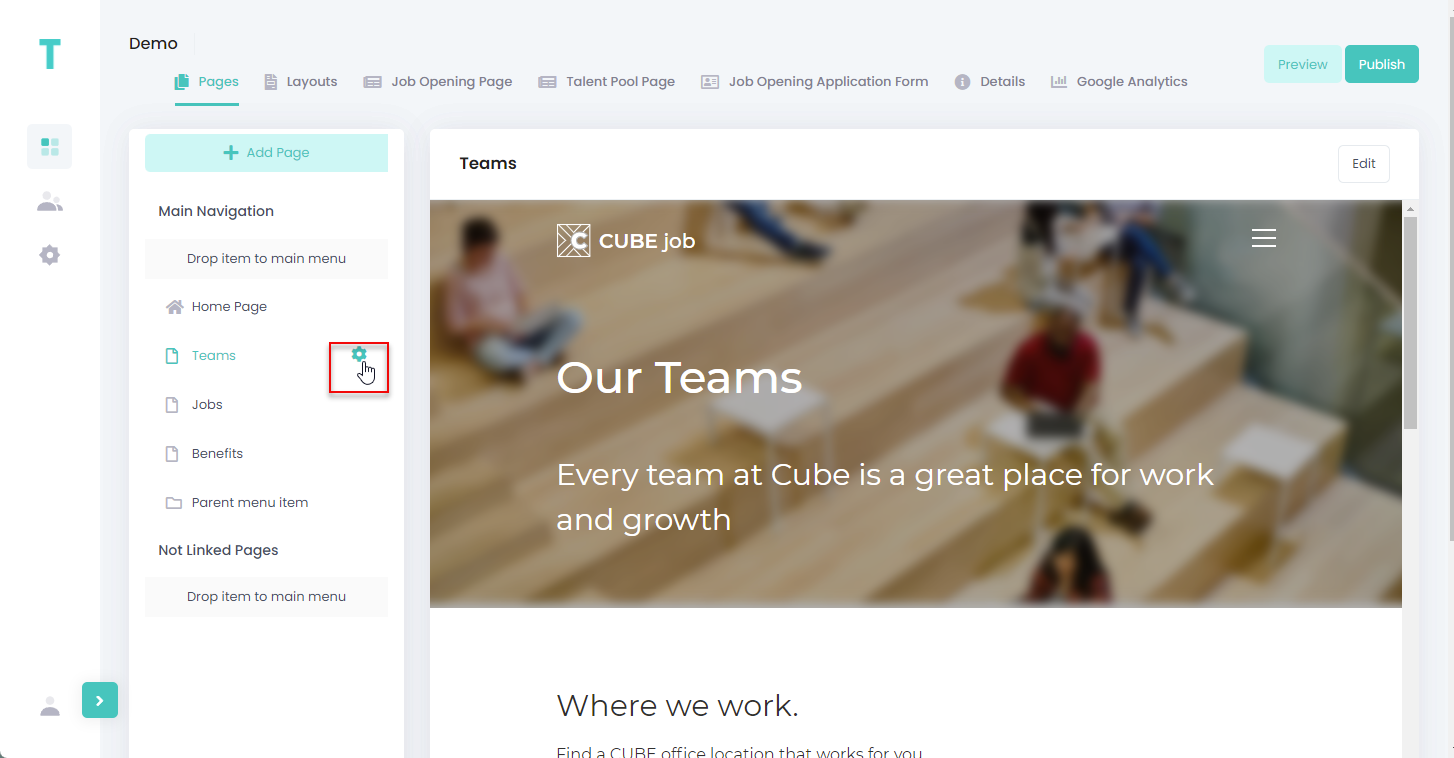
- In the Page Details window, edit the fields according to your needs:
- Page Title – Specifies the title of the page.
- Navigation Title – Specifies the title of the navigation menu item that will be used to open the page.
- Description – Specifies a description of the page. This field is optional.
- Keywords – Specifies keyword(s) that will help search engines find this page. This field is optional.
- Home Page – If you select this check box, the page will be the site home page.
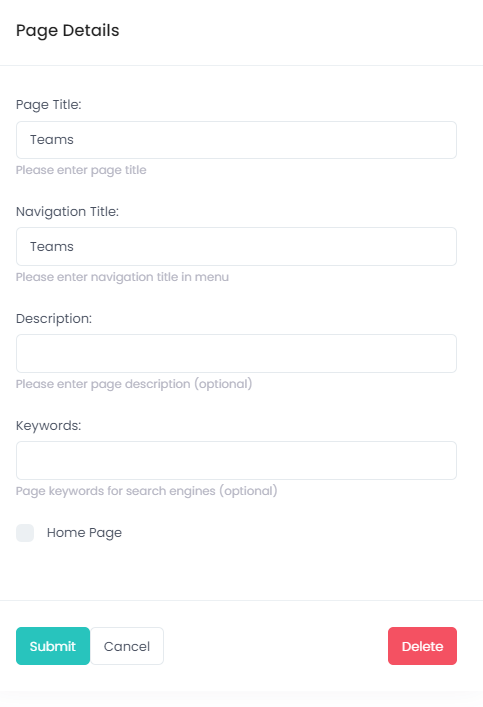
- Select Submit to save the changes.
Delete a page
To delete a page from the site:
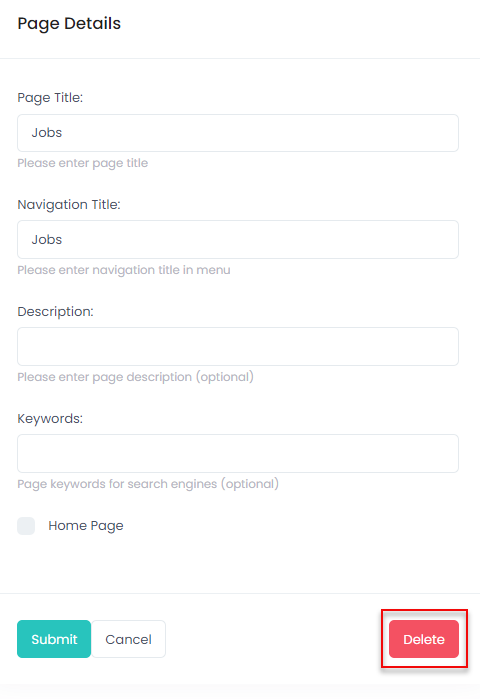
- On the Pages tab of the site management page, on the left pane, hover over the page that you want to delete.
- Select the icon next to the page title.
- In the Page Details window, select the Delete button.
- Select Yes, delete it! on the confirmation message that appears.
Add a folder (parent menu item)
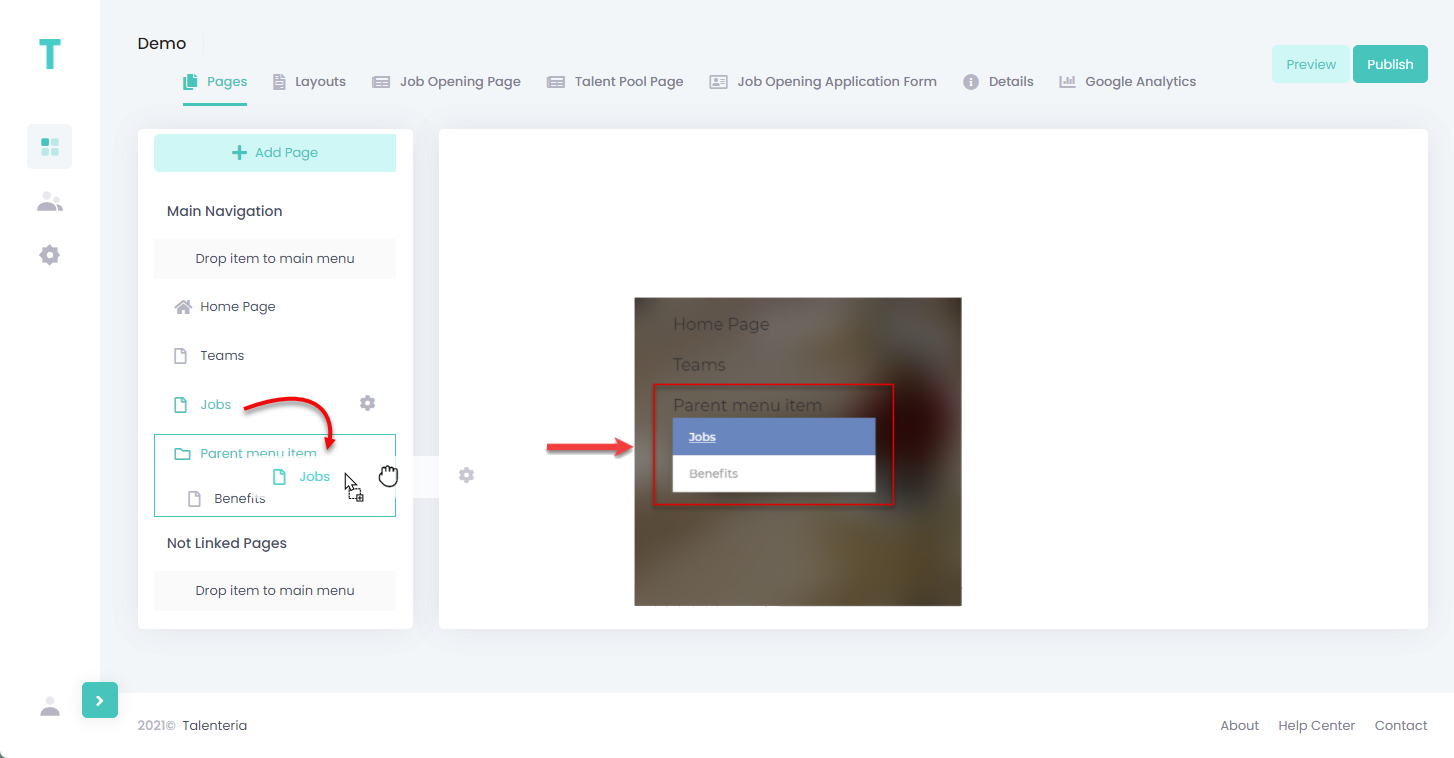
You can add a folder to a site menu. A folder in the menu serves as a parent menu item. You can then drop other pages or links into the folder so that menu items that open these other pages/links were child menu items (next menu level) in relation to the parent menu item.
To add a folder (parent menu item) to the site navigation menu and link pages to it:
- On the Pages tab of the site management page, on the left pane, select Add Page > Folder.
- Fill in the folder details:
- Folder Title – Specifies the title of the folder that will be shown in the site menu as a parent menu item.
- Description – Specifies a description of the folder.
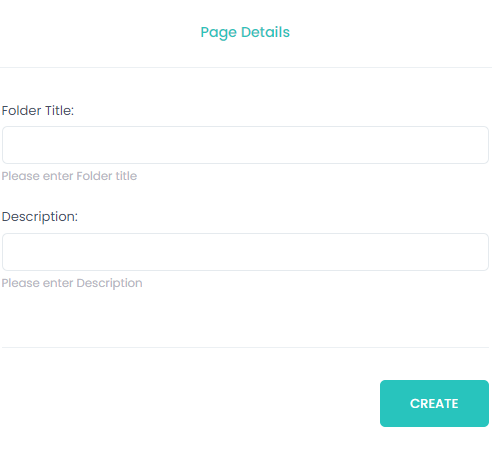
- Select Create.
- Drag other site page(s) or links into the created folder. The menu items of these pages/links will become child menu items to this folder's menu item.
Add an external link
You can add a hyperlink to an external page to the site menu as follows:
- On the Pages tab of the site management page, on the left pane, select Add Page > External Link.
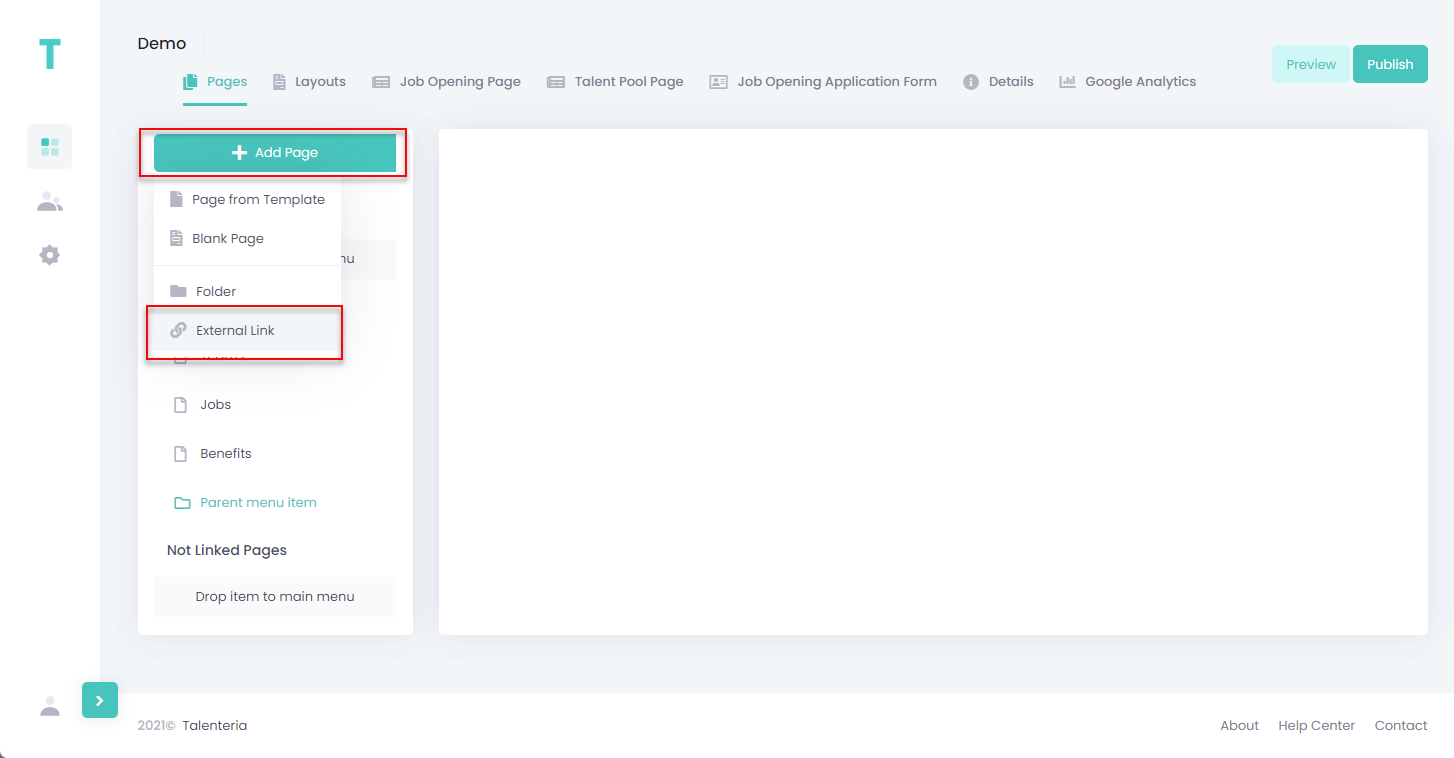
- Fill in the link details as described below:
- Title – Specifies the title of the menu item that will serve as an external link.
- Description – Specifies a description of the external link.
- External URL – Specifies the URL of the external link.
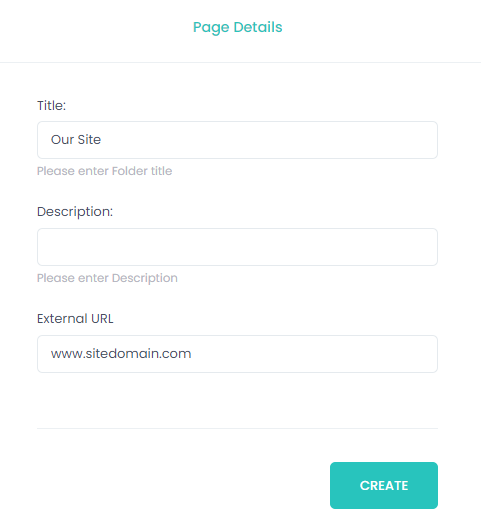
- Select Create.
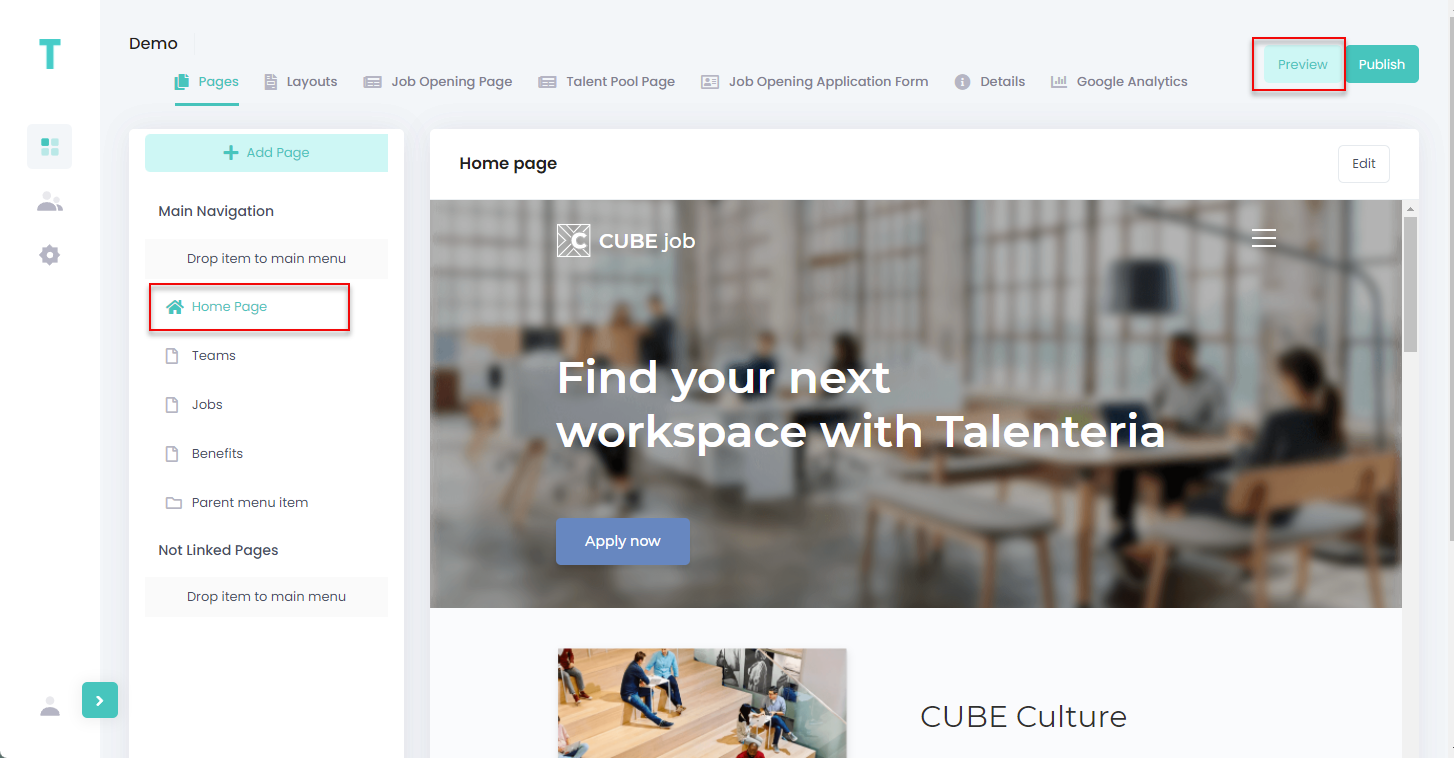
Preview site pages
You can always preview your career site pages to see how they will look like with the current configuration. To preview a site page, select a page in the Main Navigation pane on the left, and then select the Preview button in the top right corner. You can then navigate to other pages on the site preview.
Layouts
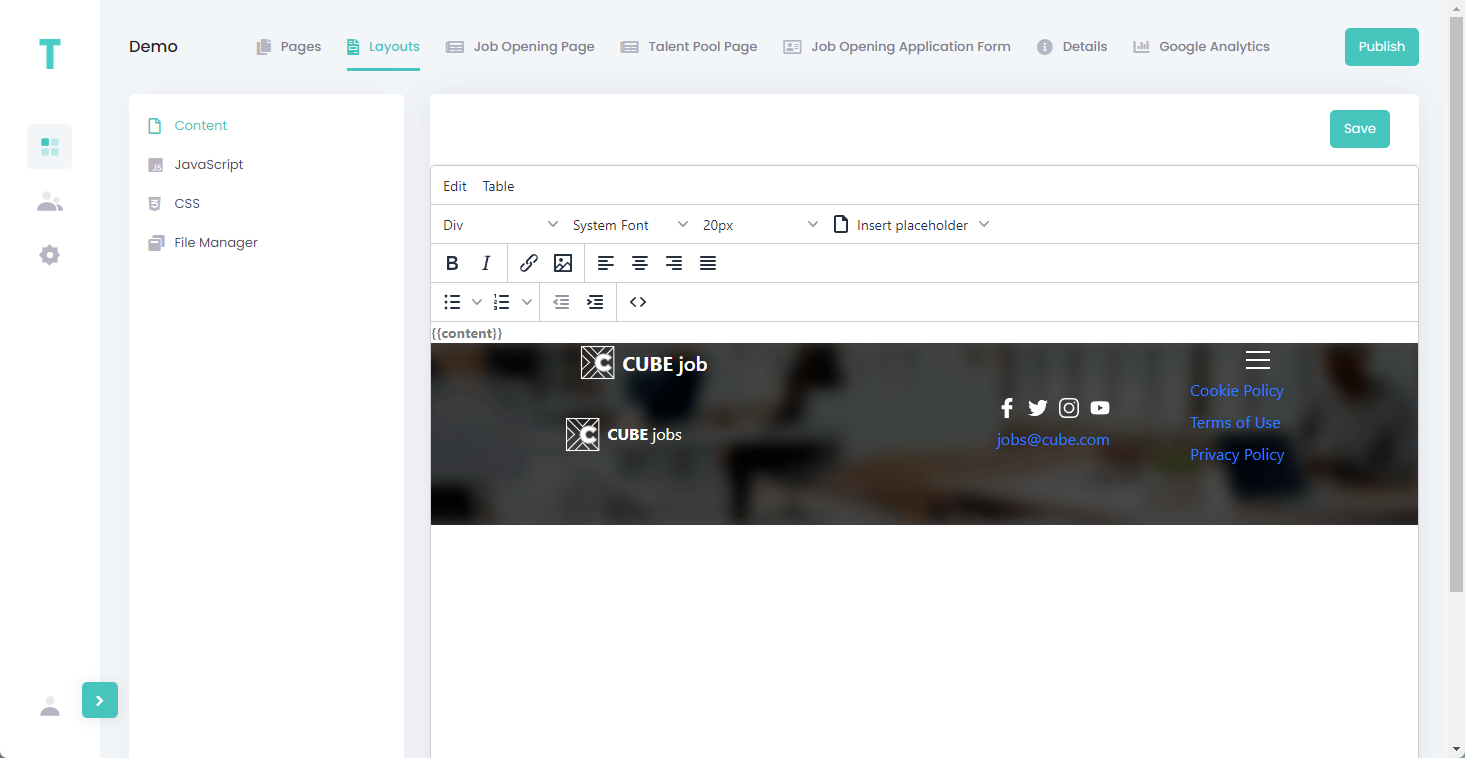
On the Layouts tab, you can configure the layout of site pages. You insert the content (the {{content}} variable) and menu (the {{menu}} variable), which you configure on the Pages tab, into this layout, and then configure other layout elements, such as page footer, header, etc. If you chose a site template during site creation, the layout will be taken from that template, however, you can edit the layout if necessary.
Whenever you make changes, select the Save button to save them.
You can edit the following layout elements:
- Content – On this tab, you edit the content of site pages. You can use the {{content}} variable to insert the content (pages) and the {{menu}} variable to insert the menu, which were configured on the Pages tab of the site management page. Other content elements can be configured with the help of the page editor.
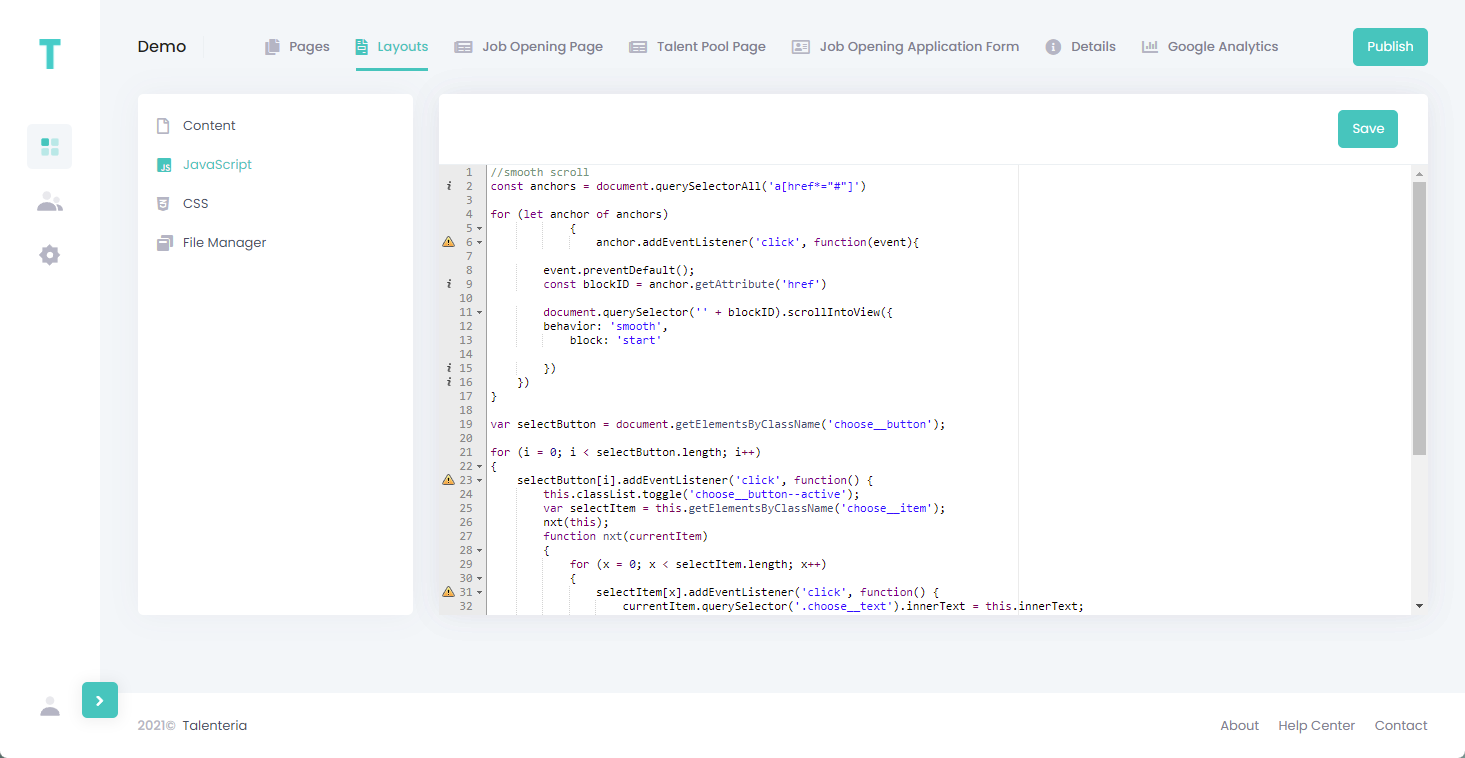
- JavaScript – On this tab, you can add or edit JavaScript code that will be used on the page layout.
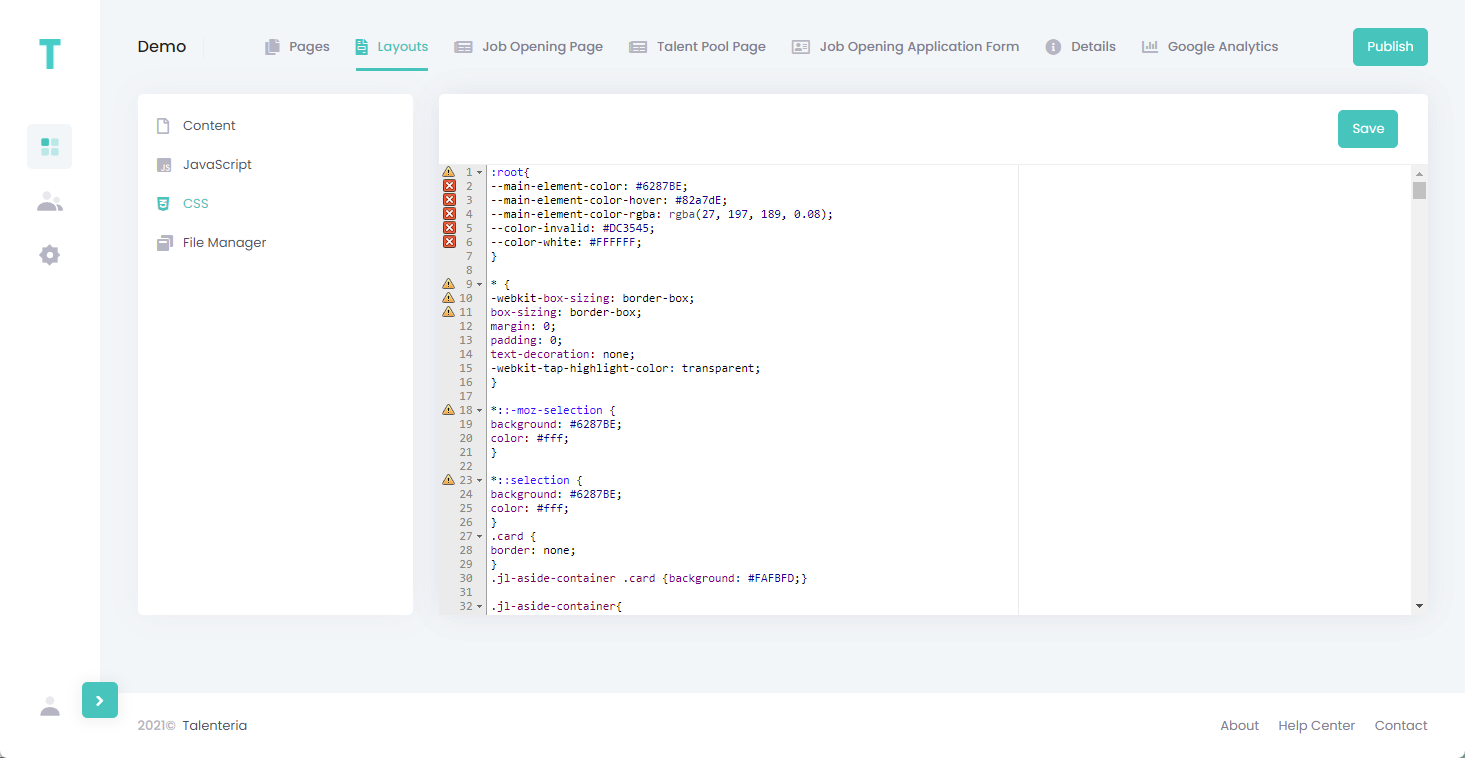
- CSS – On this tab, you can add or edit Cascading Style Sheets (CSS) used on the layout.
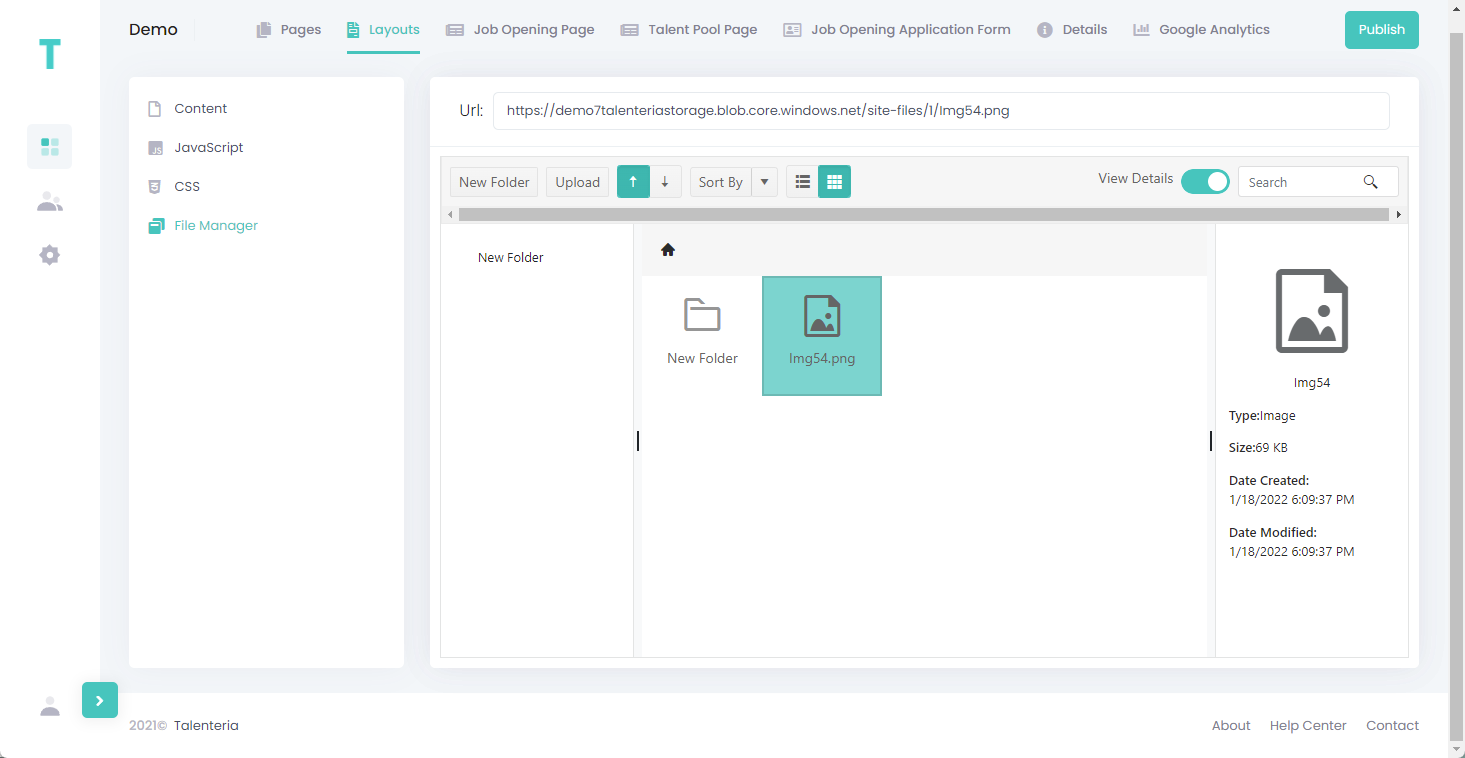
- File Manager – On this tab, you can upload and manage files that can be used on the page layout. For example, you can add images that can be inserted into the layout. In the File Manager, you can:
- Manage folders – Use the New Folder action to create folders where uploaded files will be stored. Select and hold (or right-click) a folder > Rename to rename the folder. Select and hold (or right-click) a folder > Delete to delete it.
- Upload files – Use the Upload action to upload a file. The file will be uploaded into the currently opened folder. Then, you can select the file to view its URL in the Url field, which can then be referenced in the page layout. Right-click a file > Rename to rename the file. Right-click a file > Delete to delete it.
- View file details – Select a file to view its details in the right pane. The pane with file details can be hidden or shown by toggling the View Details switch.
- Search for files – Use the search bar in the top right corner to search for files.
Job opening page
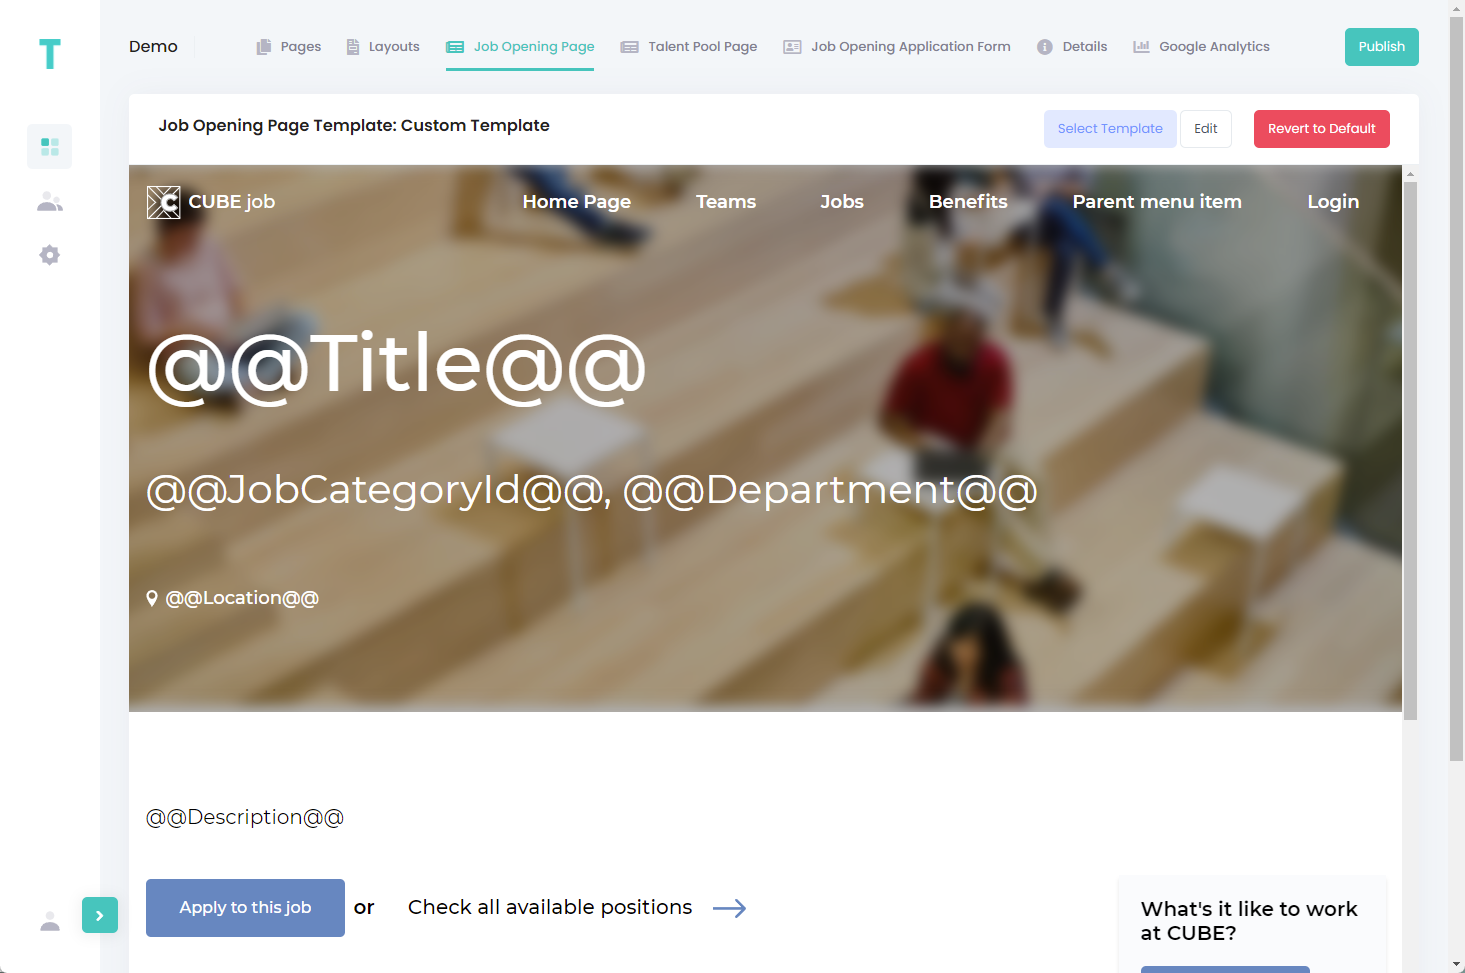
On the Job Opening Page tab, you can configure the site page where job opening details are shown when a candidate opens a specific job opening on the site. From this page, the candidate will be able to apply for the job opening. If you chose a site template during site creation, the job opening page will be taken from that template, however, you can edit the job opening page or select a different page template if necessary.
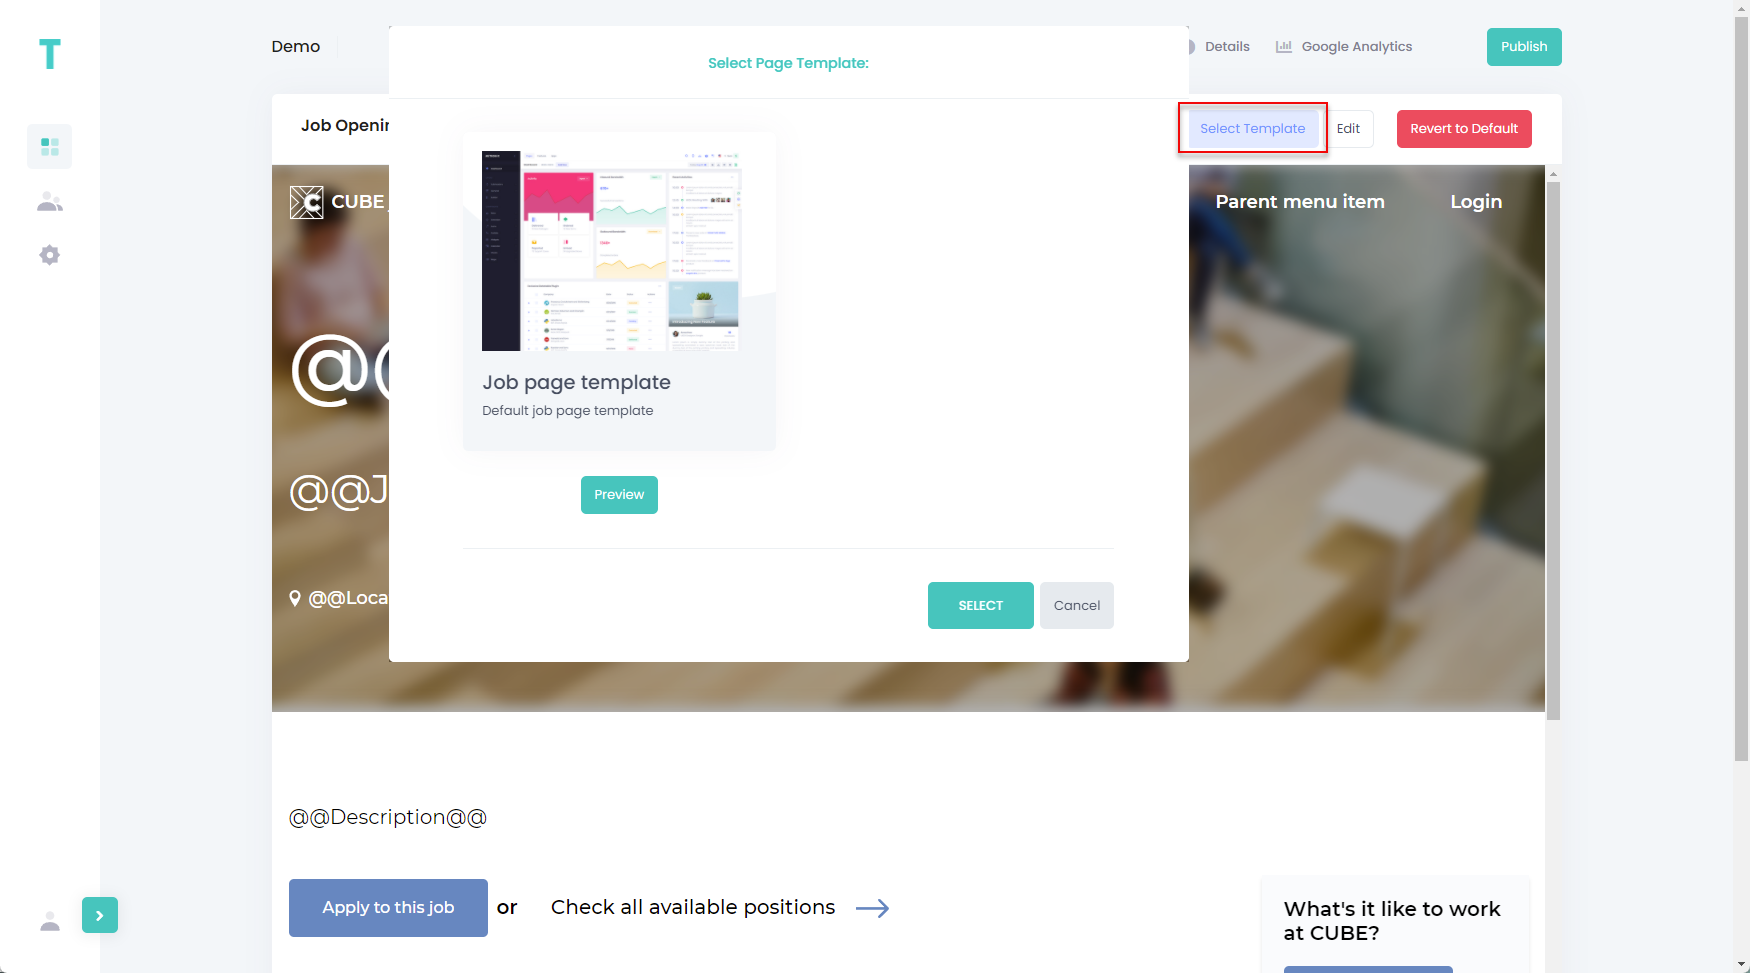
To select a different job opening page template, select the Select Template button, select a job opening page template, and then select the Select button. You can preview the page template before selecting it.
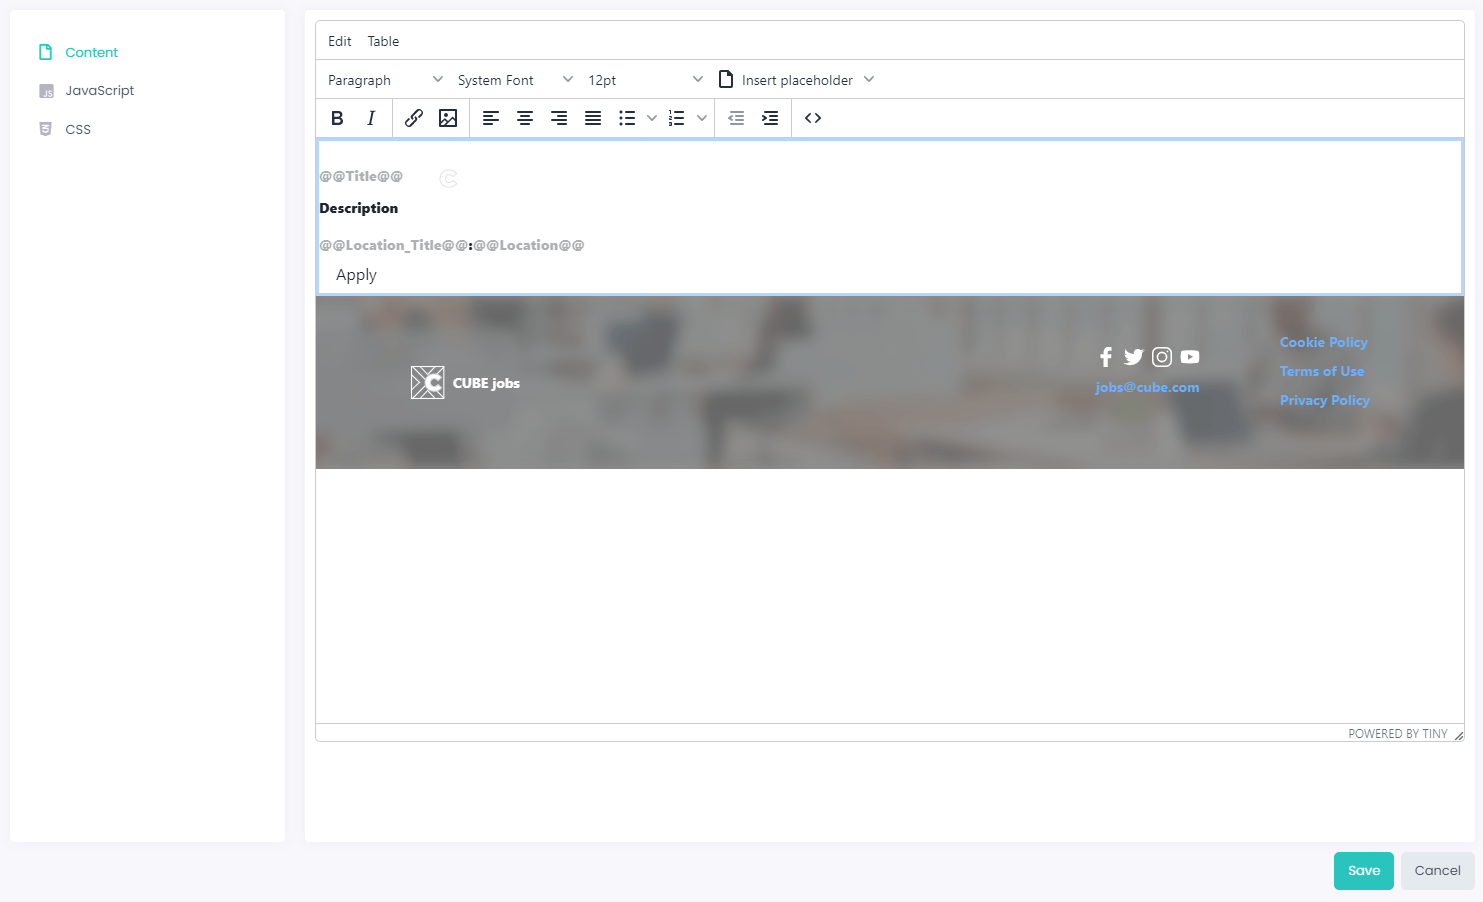
To edit the current job opening page, select the Edit button.
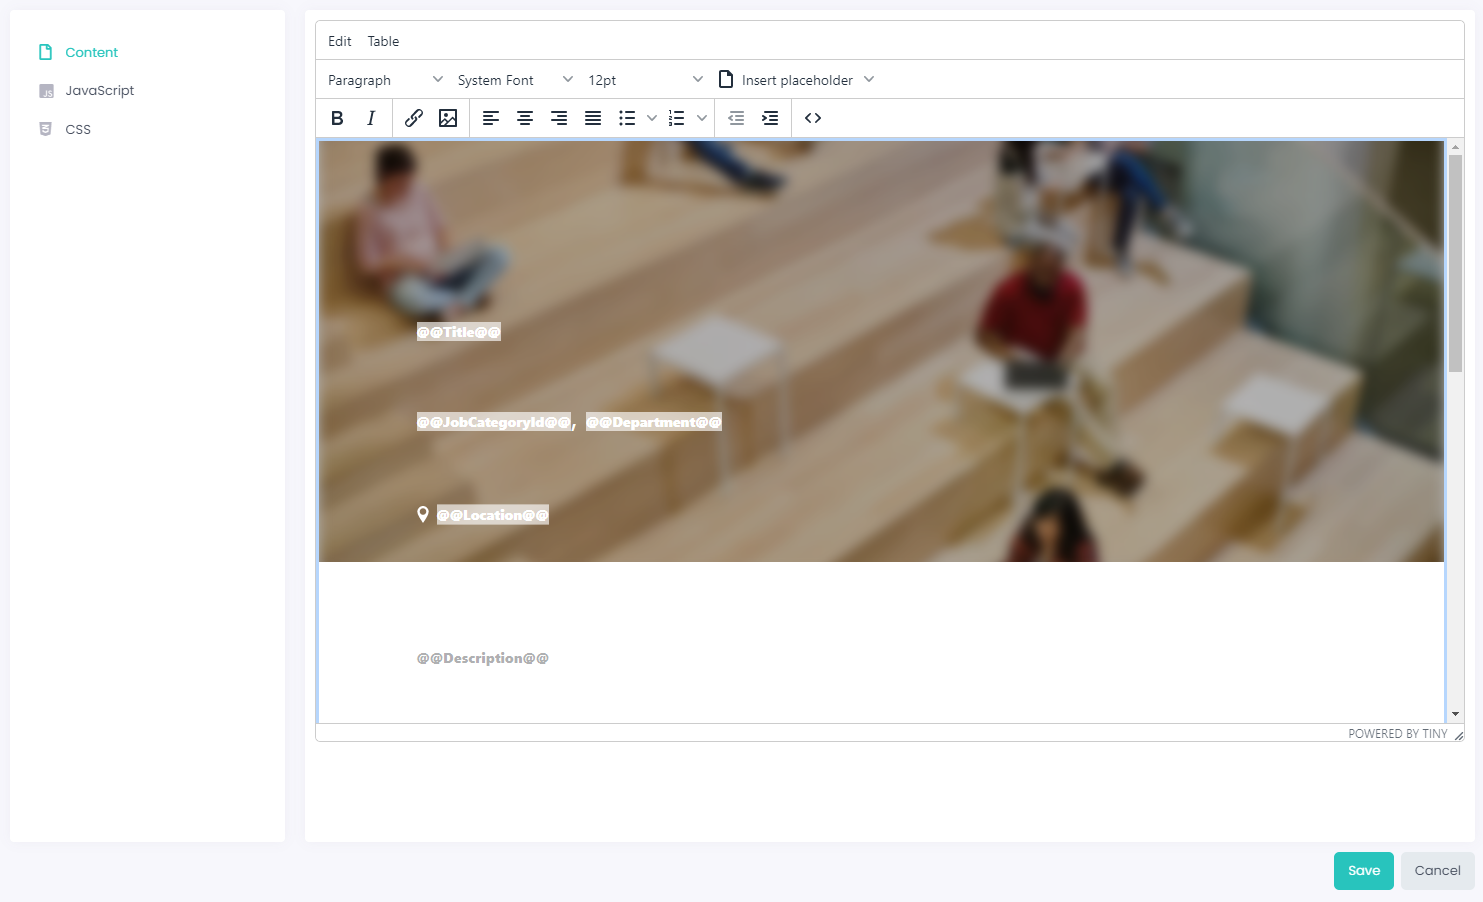
When editing the job opening page template, you can configure the following:
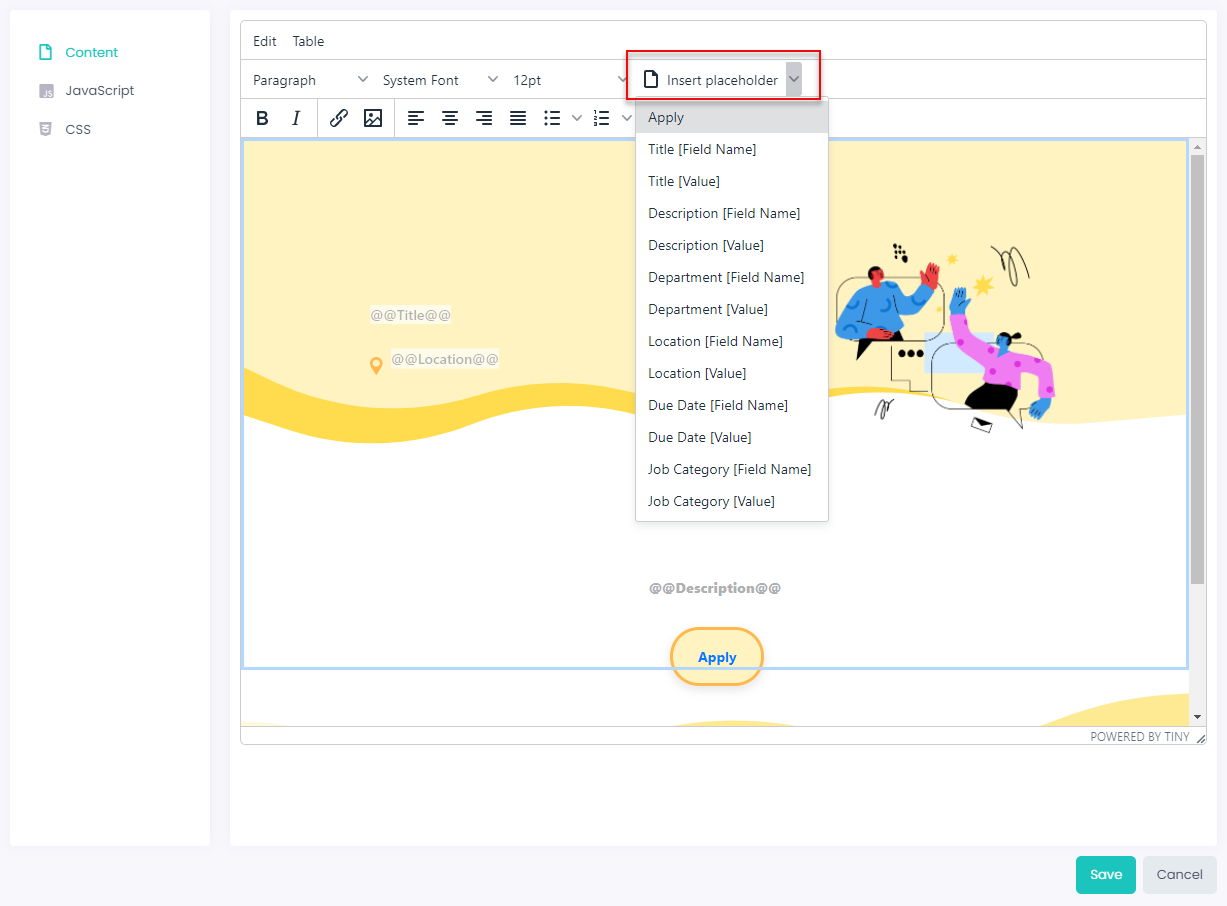
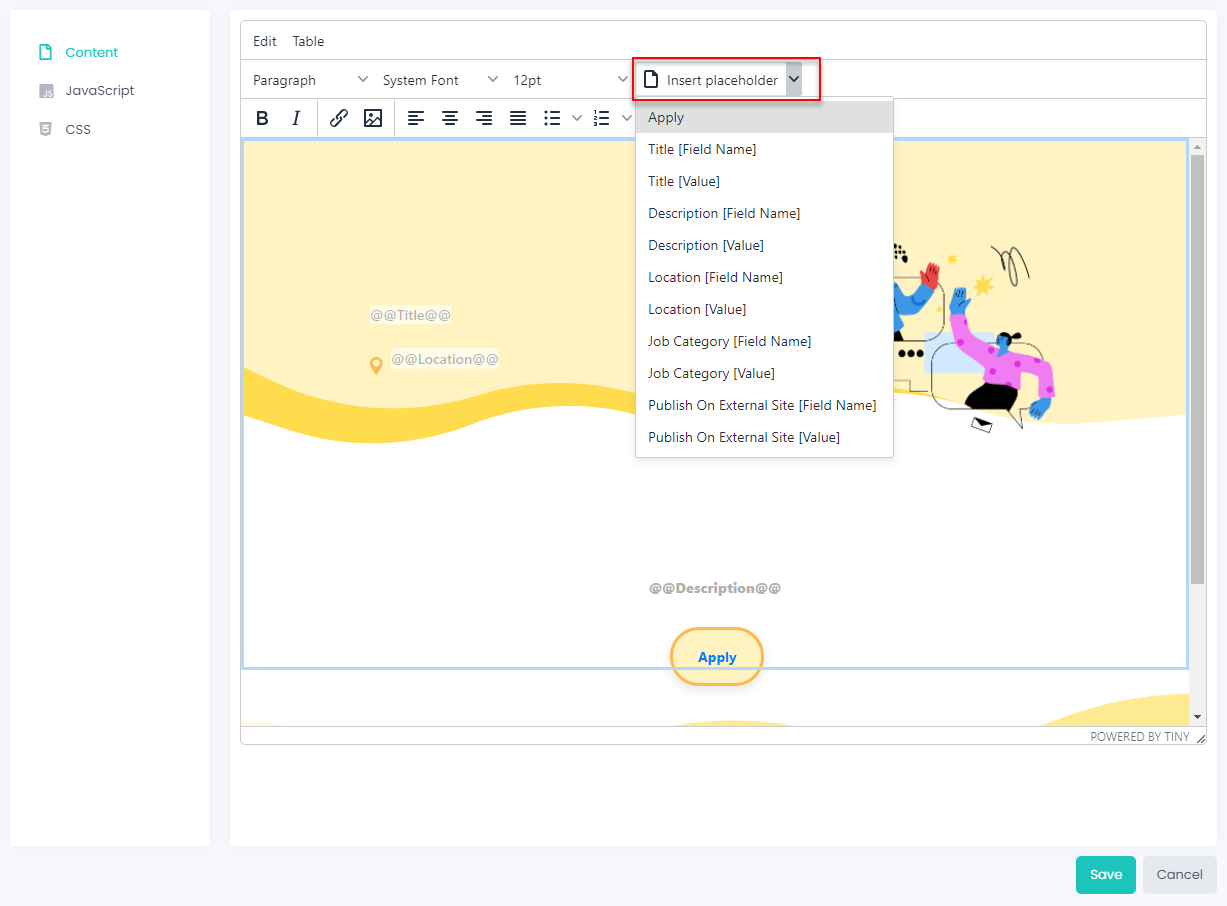
- Content – On this tab, you edit the content of job opening page pages. You can use variables, such as job opening fields (@@FieldName@@ where FieldName is the internal field name), e.g. @@Title@@, @@JobCategory@@, etc. Use the Insert placeholder drop-down menu to insert a variable (field name or field value) or to add the Apply button.
- JavaScript – On this tab, you can add or edit JavaScript code that will be used on the job opening page.
- CSS – On this tab, you can add or edit Cascading Style Sheets (CSS) used on the job opening page.
Select Save when you are done editing the job opening page.
You can always return to the default job opening page template by selecting the Revert to Default button. The button becomes available if the page template was edited.
Talent pool page
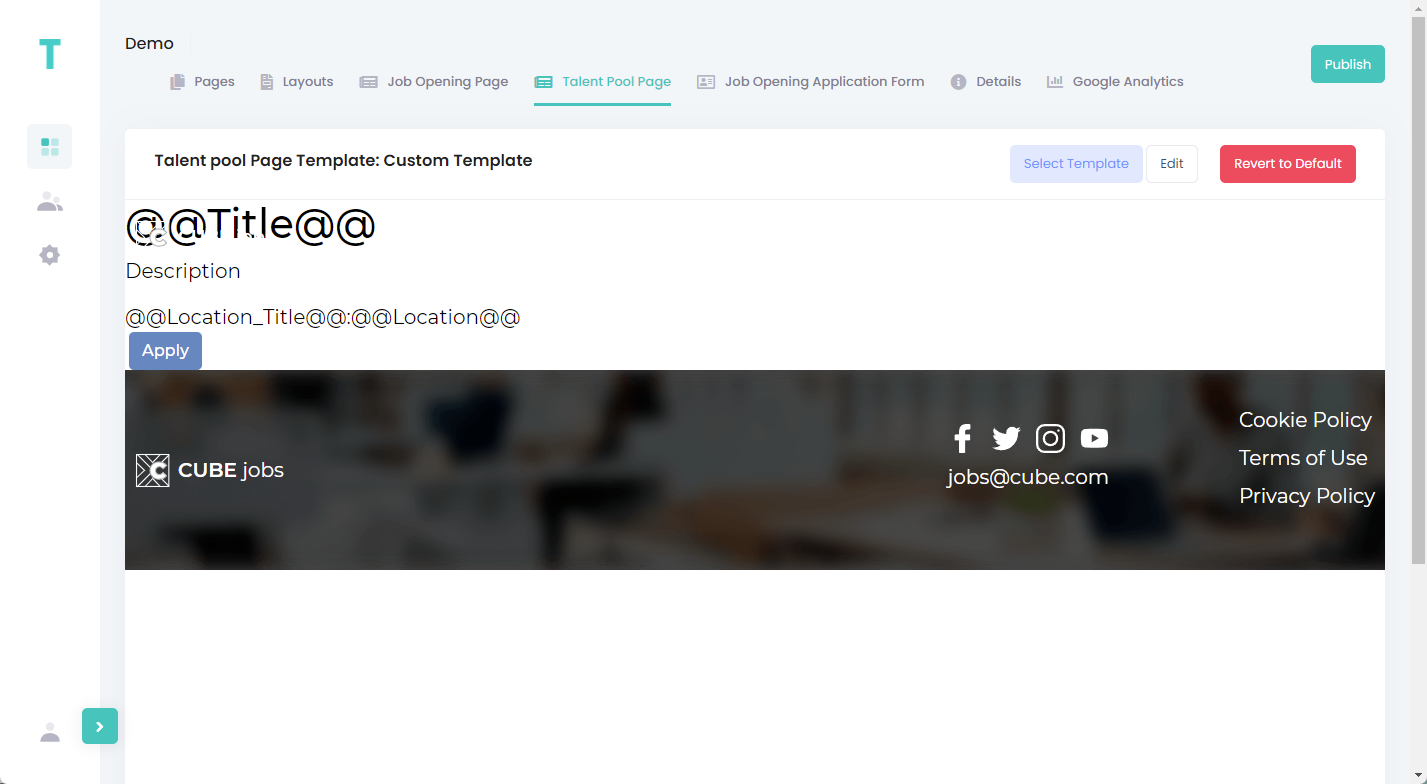
On the Talent Pool Page tab, you can configure the site page where talent pool details are shown when a candidate opens a talent pool on the site. From this page, the candidate will be able to add themselves to the talent pool. If you chose a site template during site creation, the talent pool page will be taken from that template, however, you can edit the talent pool page or select a different page template if necessary.
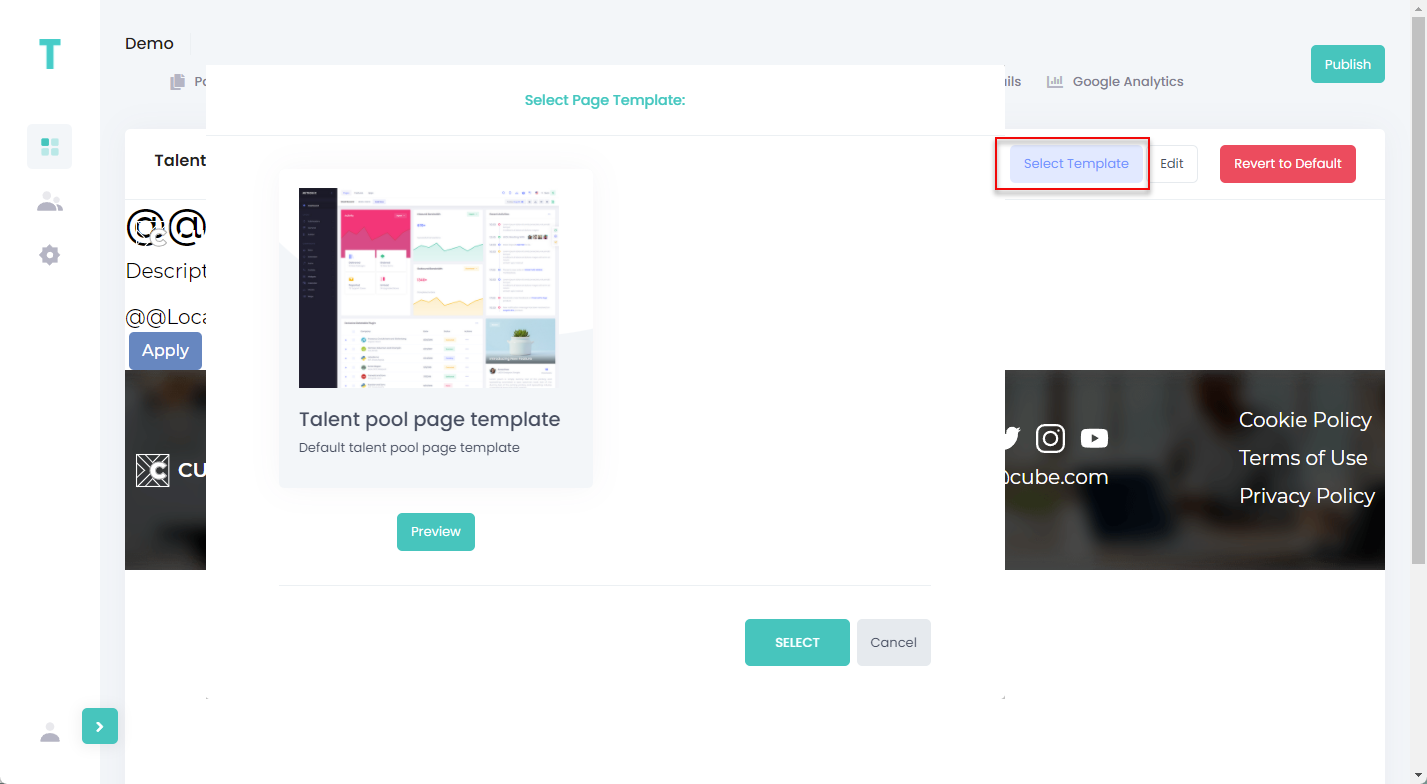
To select a different talent pool page template, select the Select Template button, select a talent pool page template, and then select the Select button. You can preview the page template before selecting it.
To edit the current talent pool page, select the Edit button.
When editing the talent pool page template, you can configure the following:
- Content – On this tab, you edit the content of talent pool page pages. You can use variables, such as talent pool fields (@@FieldName@@ where FieldName is the internal field name), e.g. @@Title@@, @@Location@@, etc. Use the Insert placeholder drop-down menu to insert a variable (field name or field value) or to add the Apply button.
- JavaScript – On this tab, you can add or edit JavaScript code that will be used on the talent pool page.
- CSS – On this tab, you can add or edit Cascading Style Sheets (CSS) used on the talent pool page.
Select Save when you are done editing the job page.
You can always return to the default job page template by selecting the Revert to Default button. The button becomes available if the page template was edited.
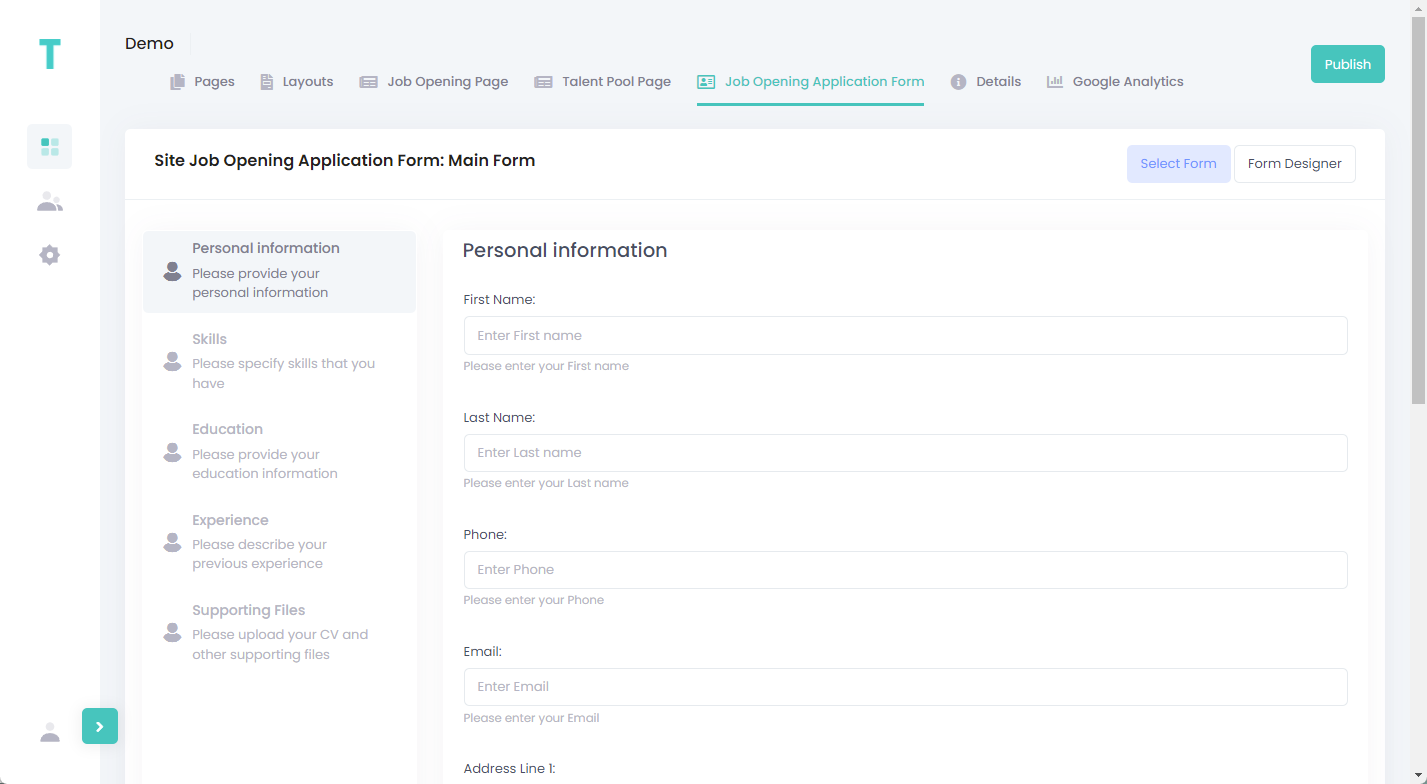
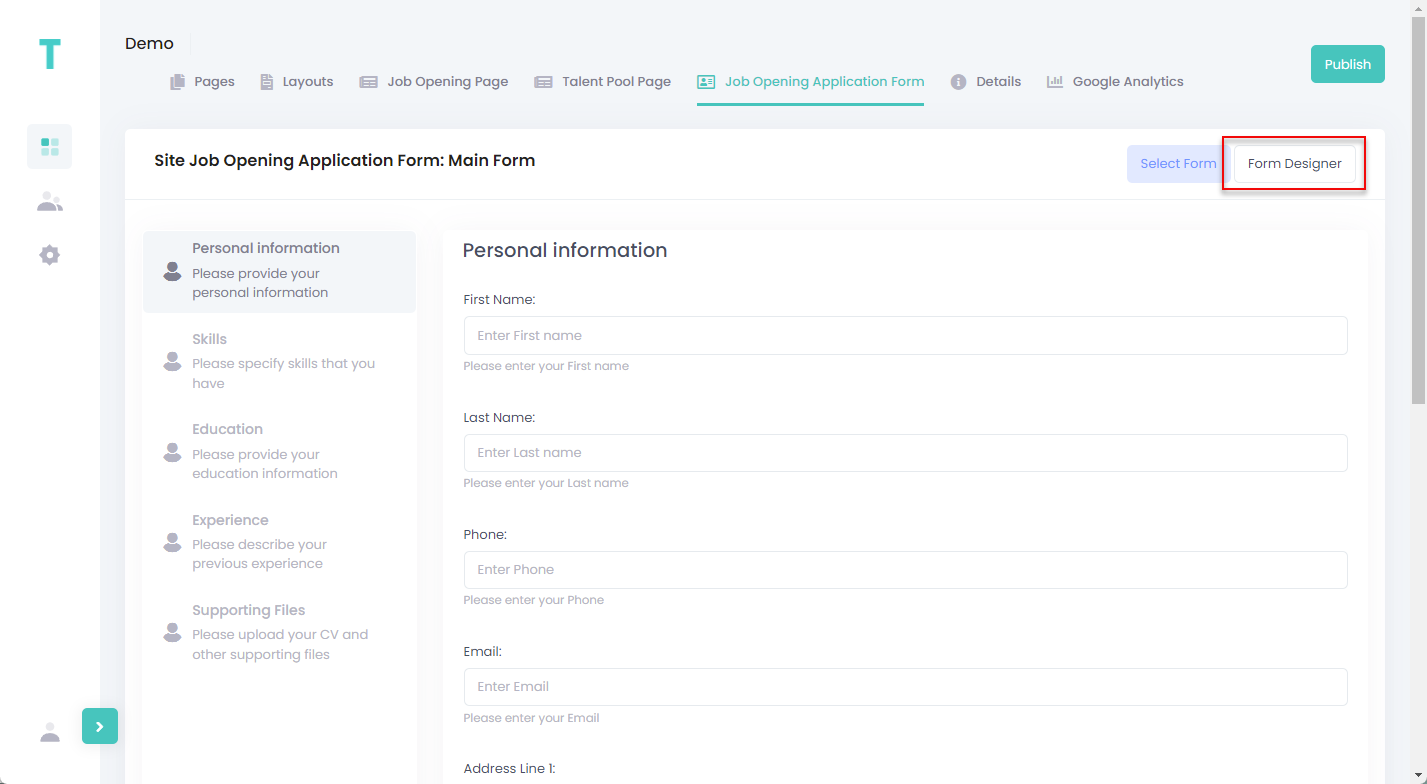
Job opening application form
On the Job Opening Application Form tab, you can configure the application form that a candidate fills in when they apply for a job opening or talent pool. If you chose a site template during site creation, the job opening application form will be taken from that template, however, you can edit the job opening application form or select a job opening application form if necessary.
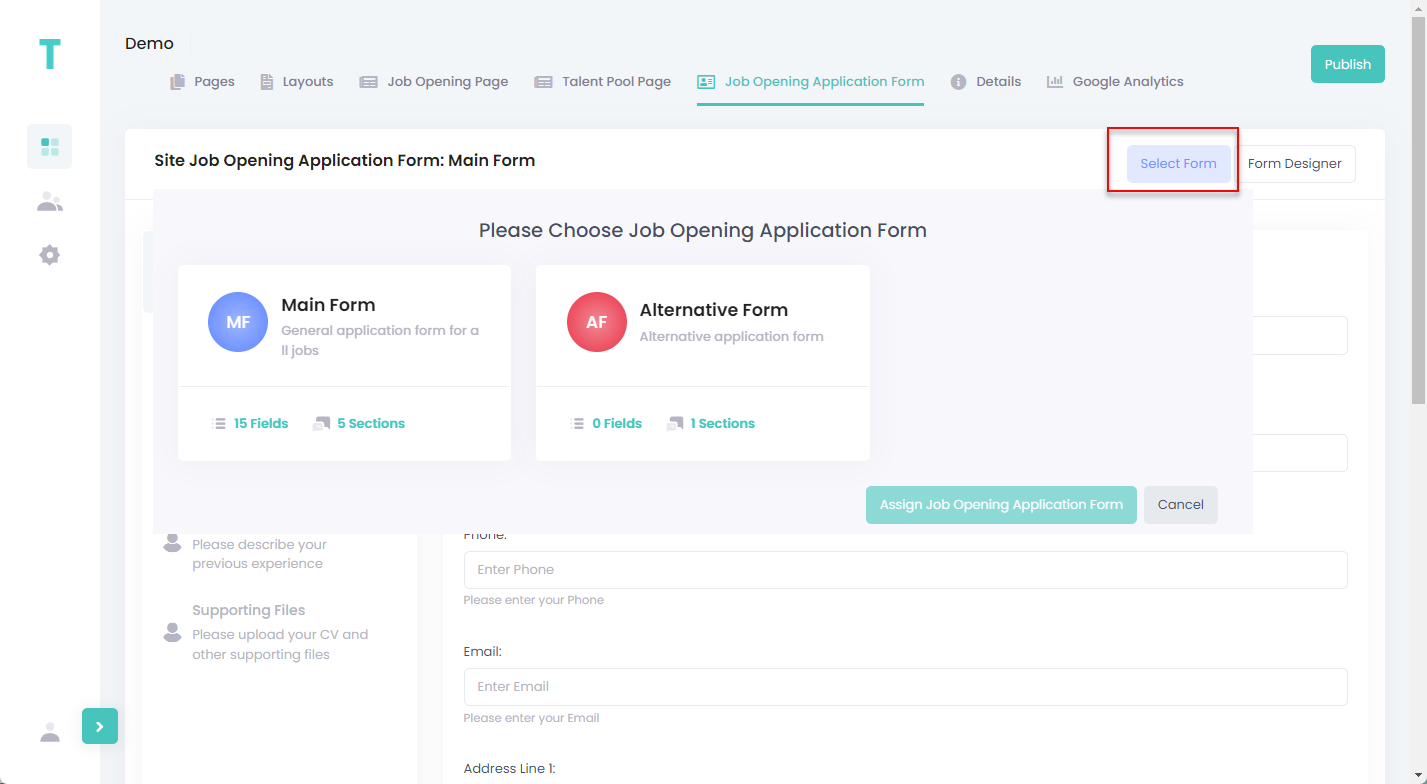
To select a different job opening application form, select the Select Form button, select an application form, and then select the Select button. You can preview the page template before selecting it.
To edit the current application form, select the Form Designer button, and then configure the application form contents in the Job Opening Application Form Designer.
Details
On the Details tab, you can edit the site details that were specified during site creation as well as other details.
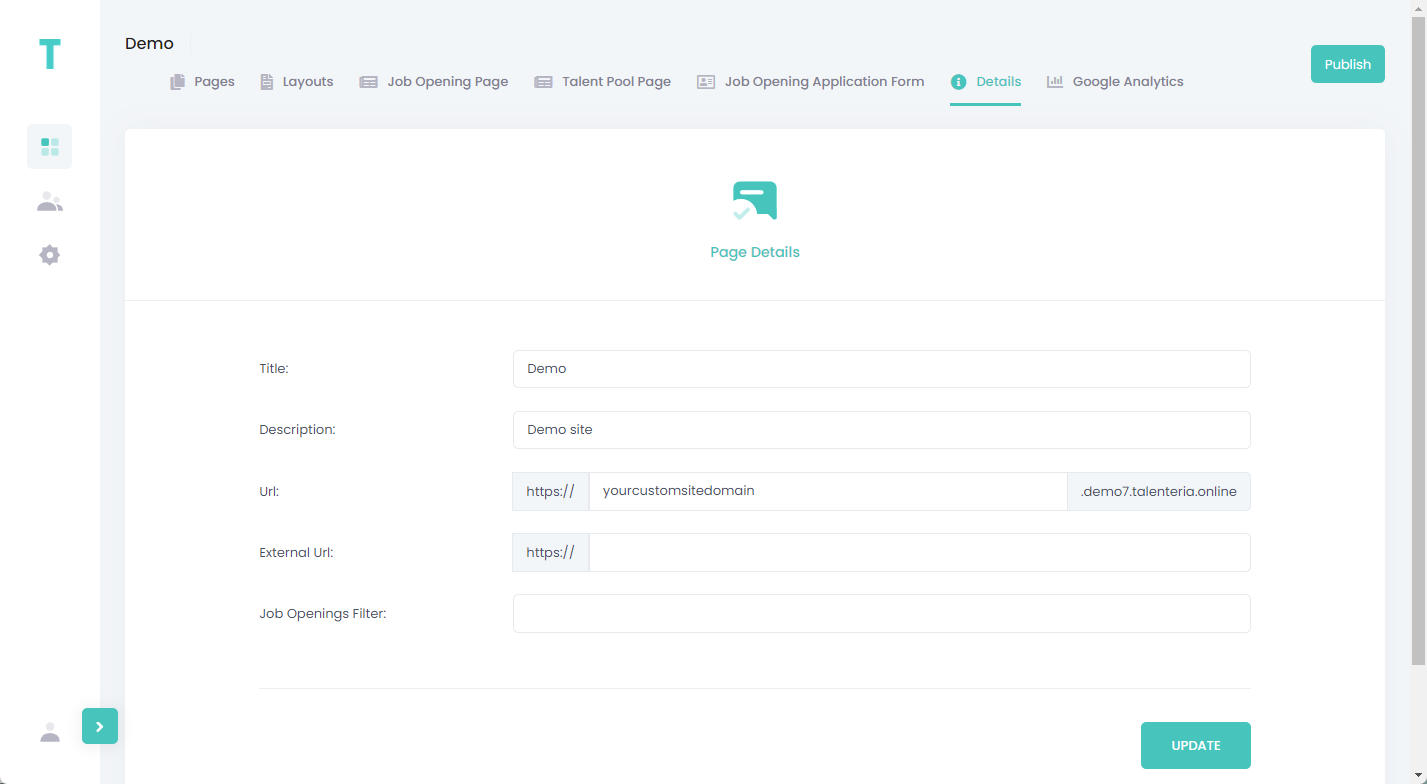
The following site details can be configured:
- Title – Specifies the title of the site that will be used to identify it in Talenteria.
- Description – Specifies a description of the site that will be visible in Talenteria.
- Url – Specifies the URL of the site. The site hosting is provided by Talenteria. The URL main domain is preconfigured and depends on your Talenteria environment. You need to fill in the the customizable part between the URL scheme and main domain with your custom subdomain name. E.g. https://yourcustomsubdomainname.demo.talenteria.online where yourcustomsubdomain is the customizable part of the URL that you need to fill in.
- External Url – Specifies a custom site URL that will be used in addition to the site URL specified in the Site URL field.NoteAt present, filling in the External Url field is not enough for the external site URL to work properly. If you want to use an external site URL for this site, please request the Talenteria team to help you configure this feature.
- Jobs Openings Filter – Specifies a filter that can be used to only publish job openings that meet the criteria of this filter. If you leave this setting empty, all open job openings will be published on this career site. To add job opening filter(s), fill in this field with FieldName = 'FieldValue' where FieldName is the name of a job opening field and JobFieldValue is the value that the field must have to meet the criterion. If you add more than one filter, you can use the And and Or operators.
Examples of job opening filters:
Location = 'Boston'
Location = 'Boston' And Department = 'IT'
Location = 'Seattle' Or Department = 'Sales'
Google Analytics
On the Google Analytics tab, you can configure integration of this site with Google Analytics. Configuring these settings is necessary for Google to be able to collect statistics about this site as well as for Talenteria to be able to retrieve site statistics from Google to show it on the landing page charts.
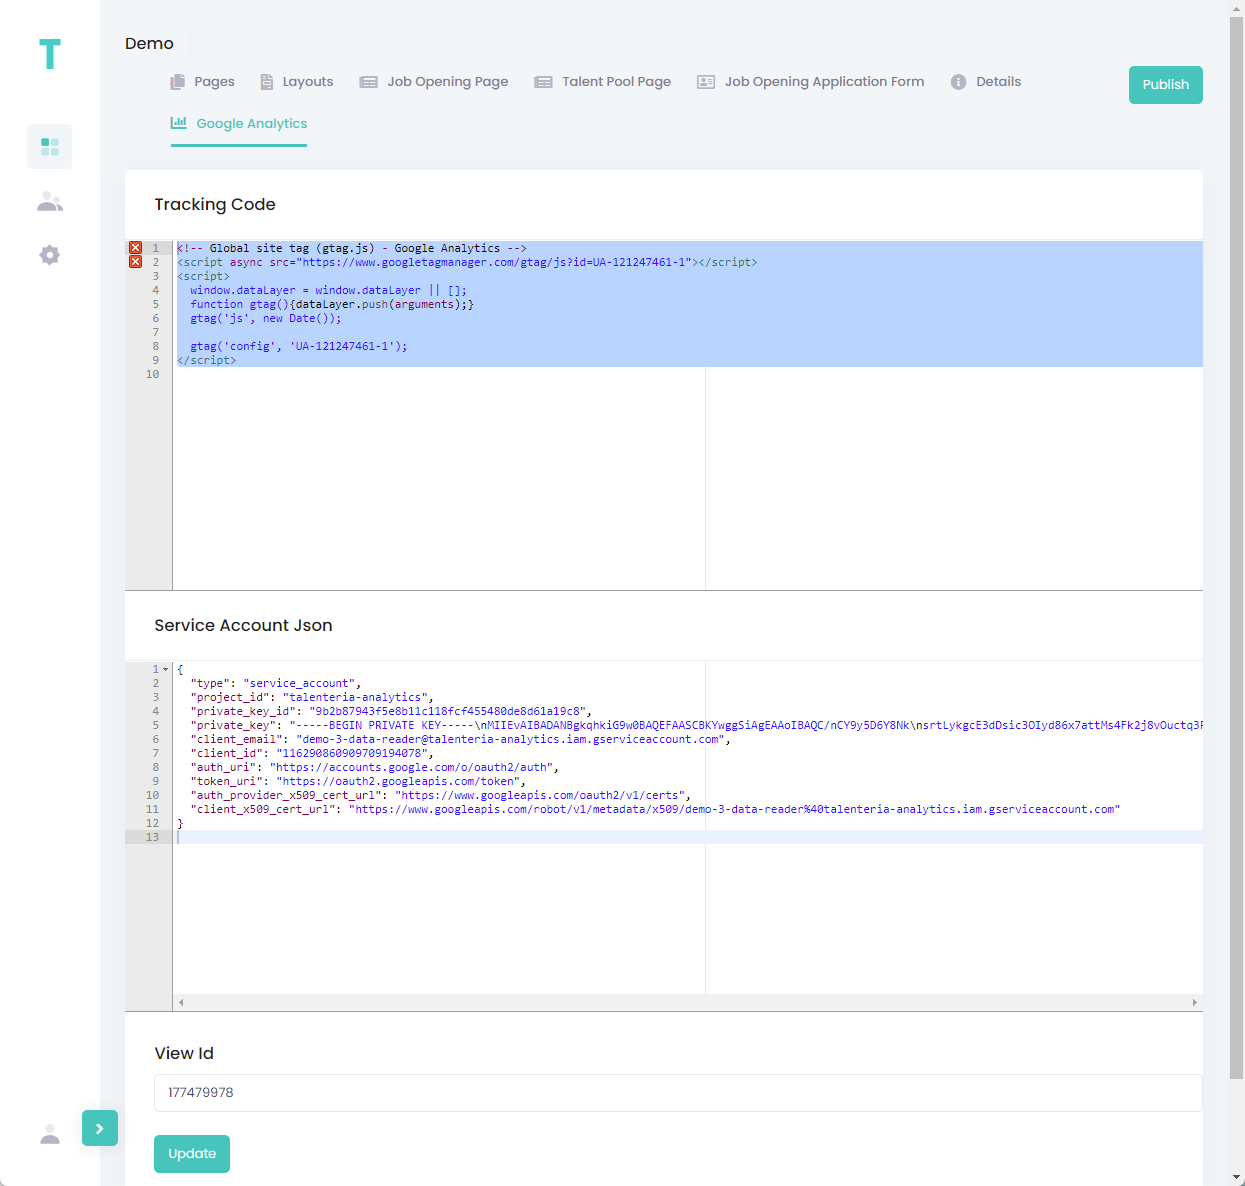
Configure the following Google Analytics settings:
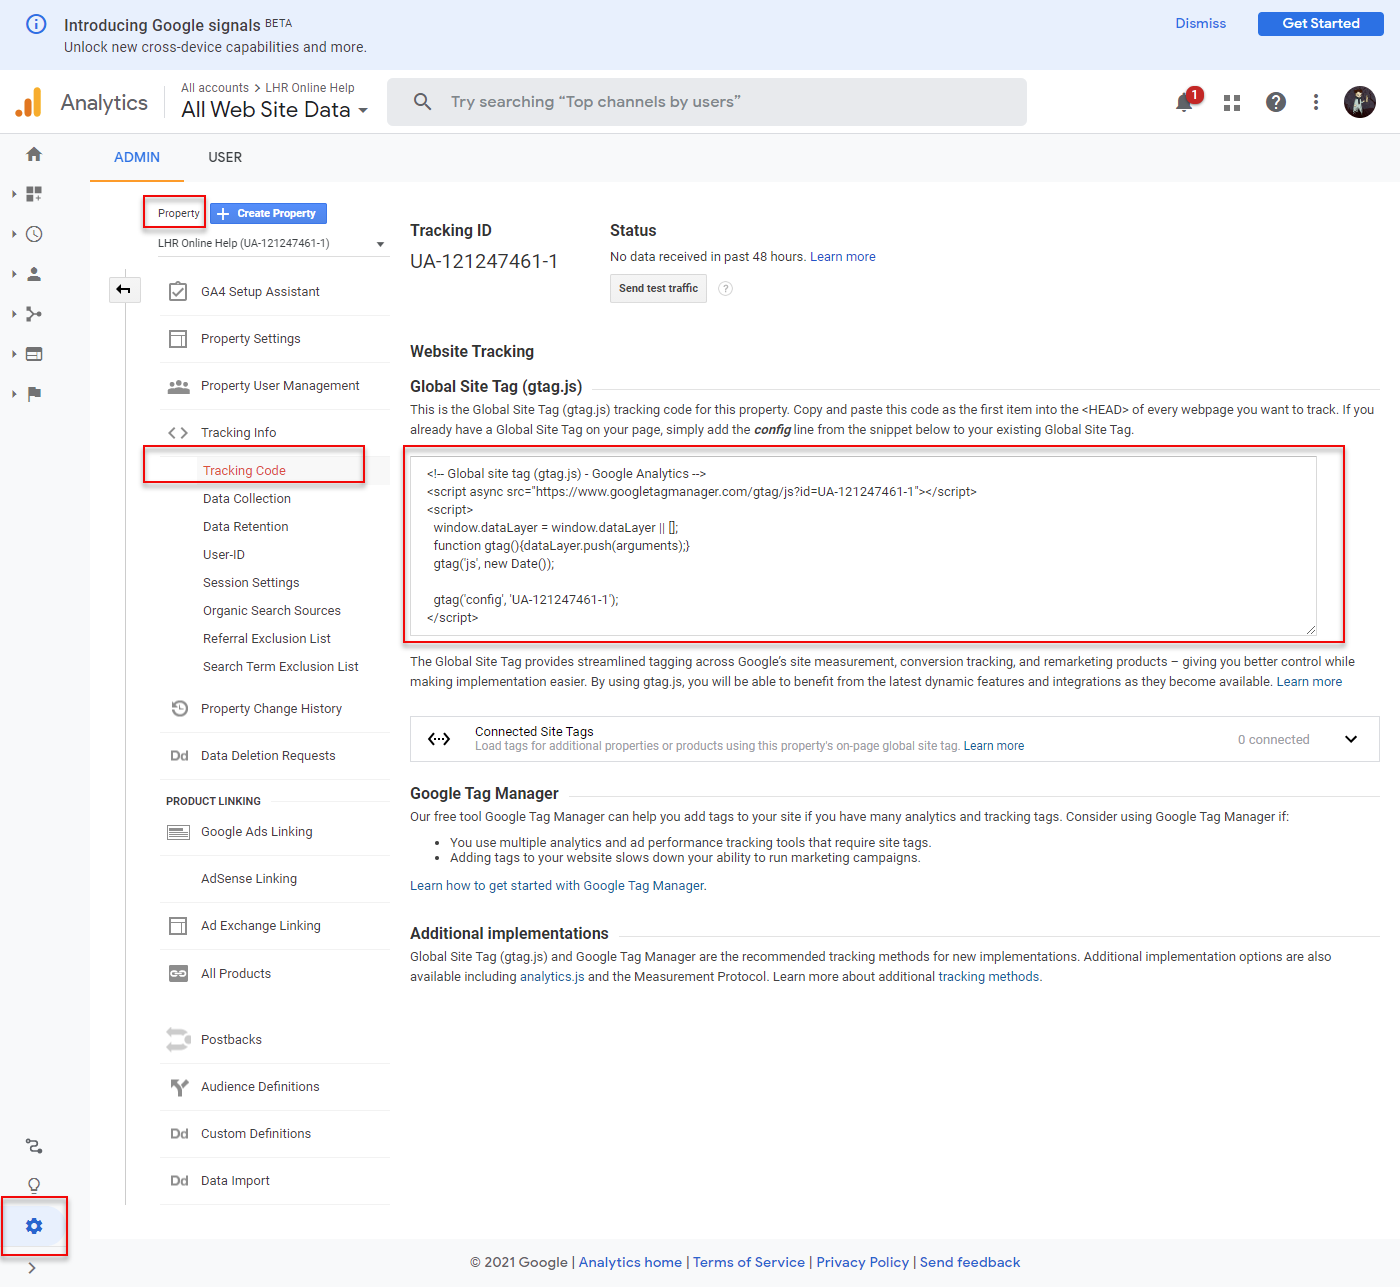
- Tracking Code – Specifies the Global Site Tag (gtag.js) tracking code. This tracking code in combination with the view ID is used by Google Analytics to track your site and collect statistics. Copy this code from the Global Site Tag(gtag.js) field in your Google Analytics account at https://analytics.google.com/ for this site: go to Admin > Property (select the property for this career site or create a new property for it) > Tracking Info > Tracking Code. Prior to this, you need to create a Talenteria account and register this site as a site property in Google Analytics.
- Service Account JSON – Specifies the JSON of the Google service account that has Read & Analyze permissions for your career site. This service account JSON is used to enable Talenteria to retrieve site statistics collected by Google Analytics and show it on landing page charts. You need to create such a service account in Google Cloud for this purpose (not real user email), and then add it with Read & Analyze permissions for your career site in Google Analytics (Admin > Property (select the property for this career site or create a new property for it) > Property Access Management). Then, you can copy the service account JSON from the JSON key file downloaded from Google Cloud and paste it into this setting. For more information, see Configure a Google Service Account for Google Analytics.
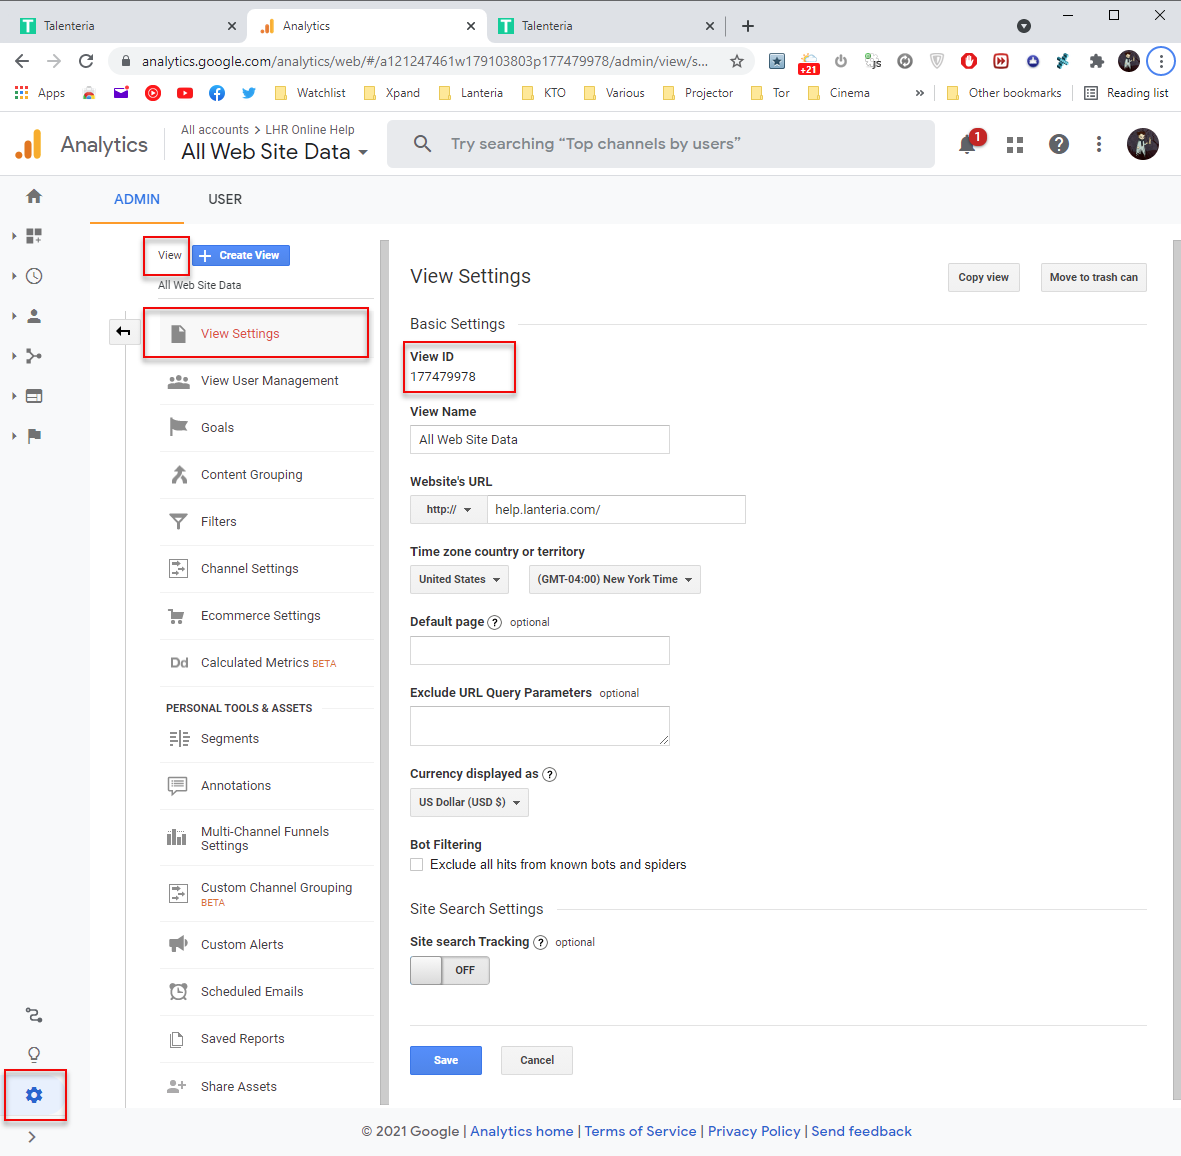
- View Id – Specifies the view ID of this career site's property in Google Analytics. This view ID in combination with the tracking code is used by Google Analytics to track your site and collect statistics. Copy this ID from the View ID field in your Google Analytics account for this site: go to Admin > Property (select the property for this career site or create a new property for it) > View Settings > Basic Settings > the View ID field.
Select the Update button if you change the Google Analytics settings.
Publish site
Once you are done making changes to the site configuration, select the Publish button in the top right corner to publish the site. You need to republish the site whenever you change its configuration.